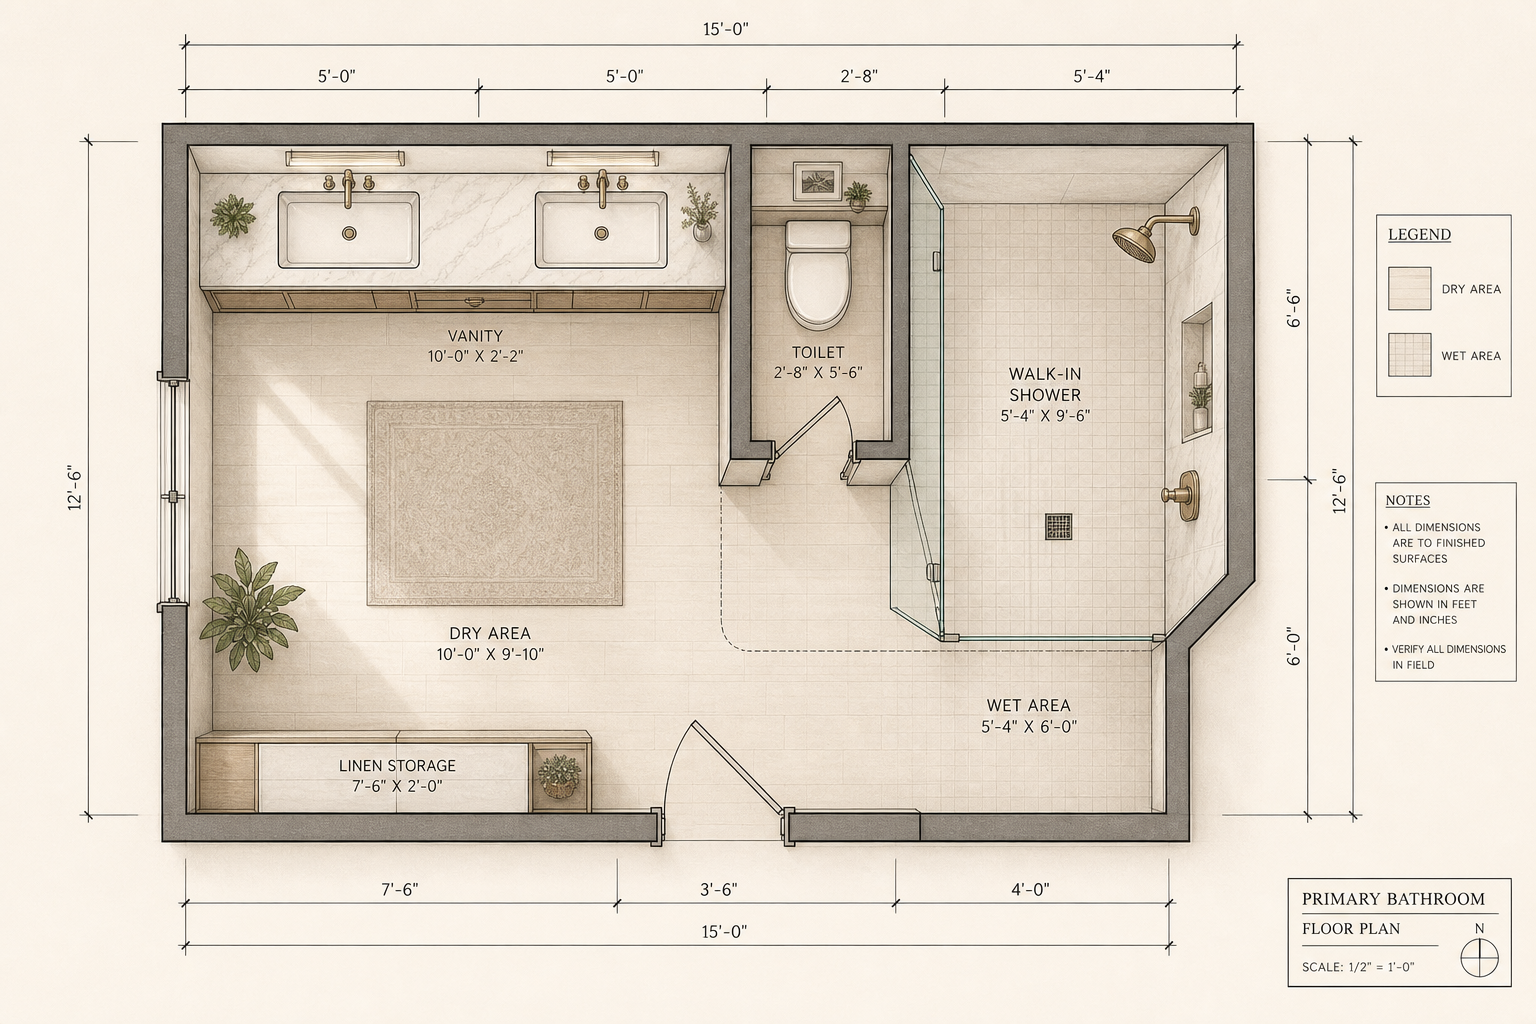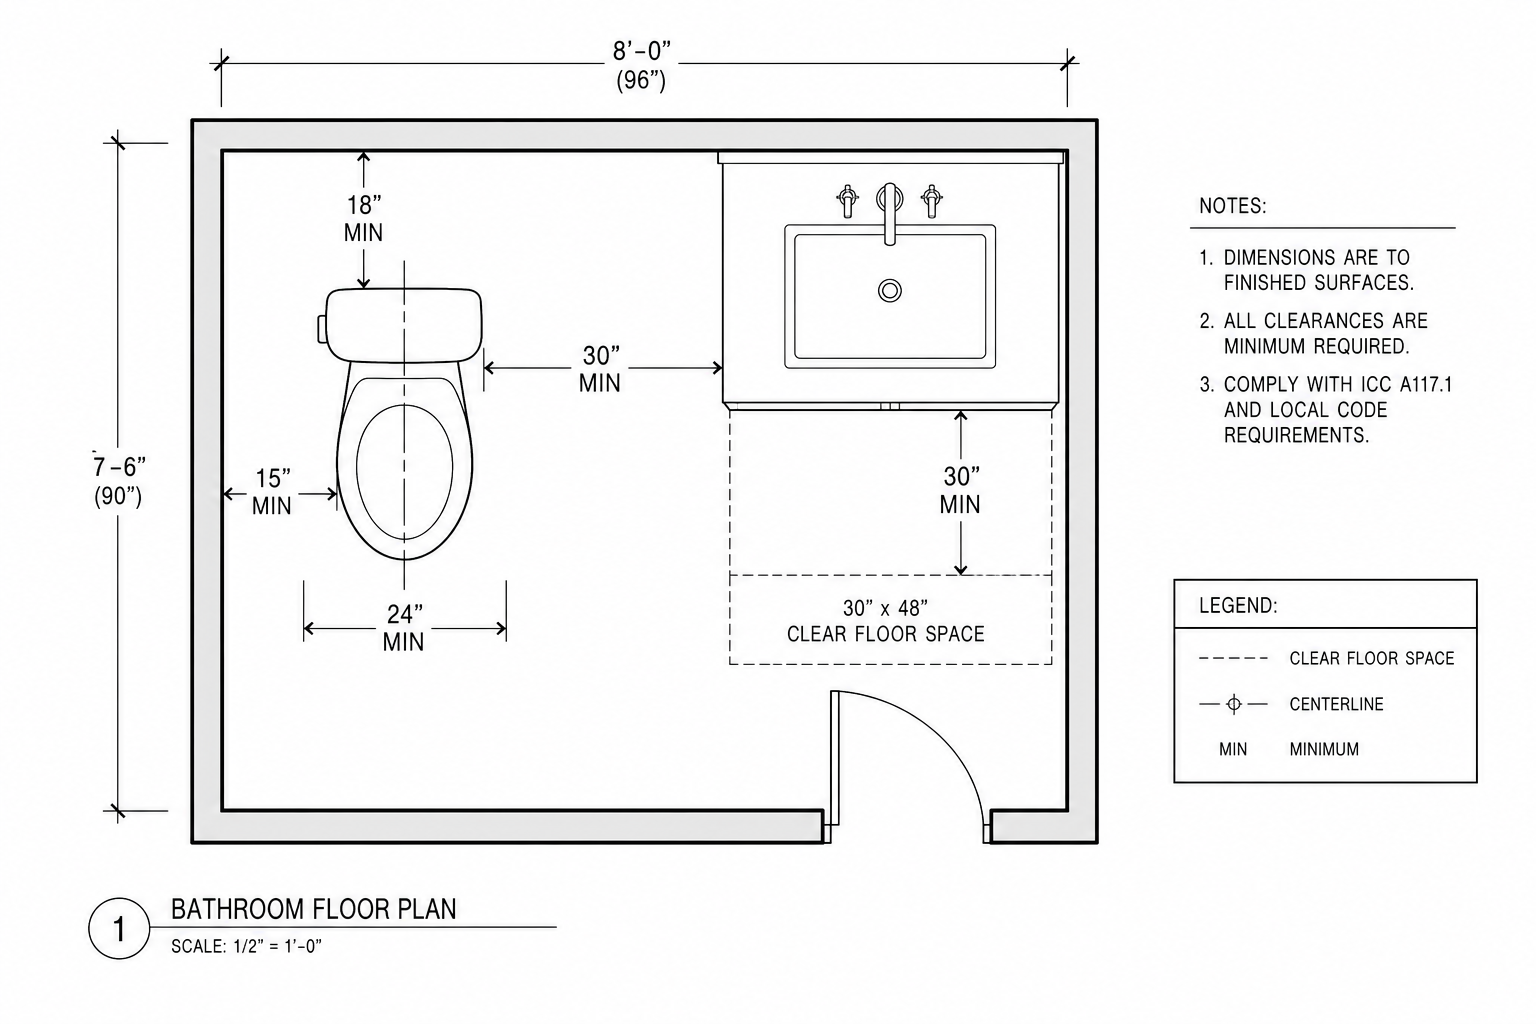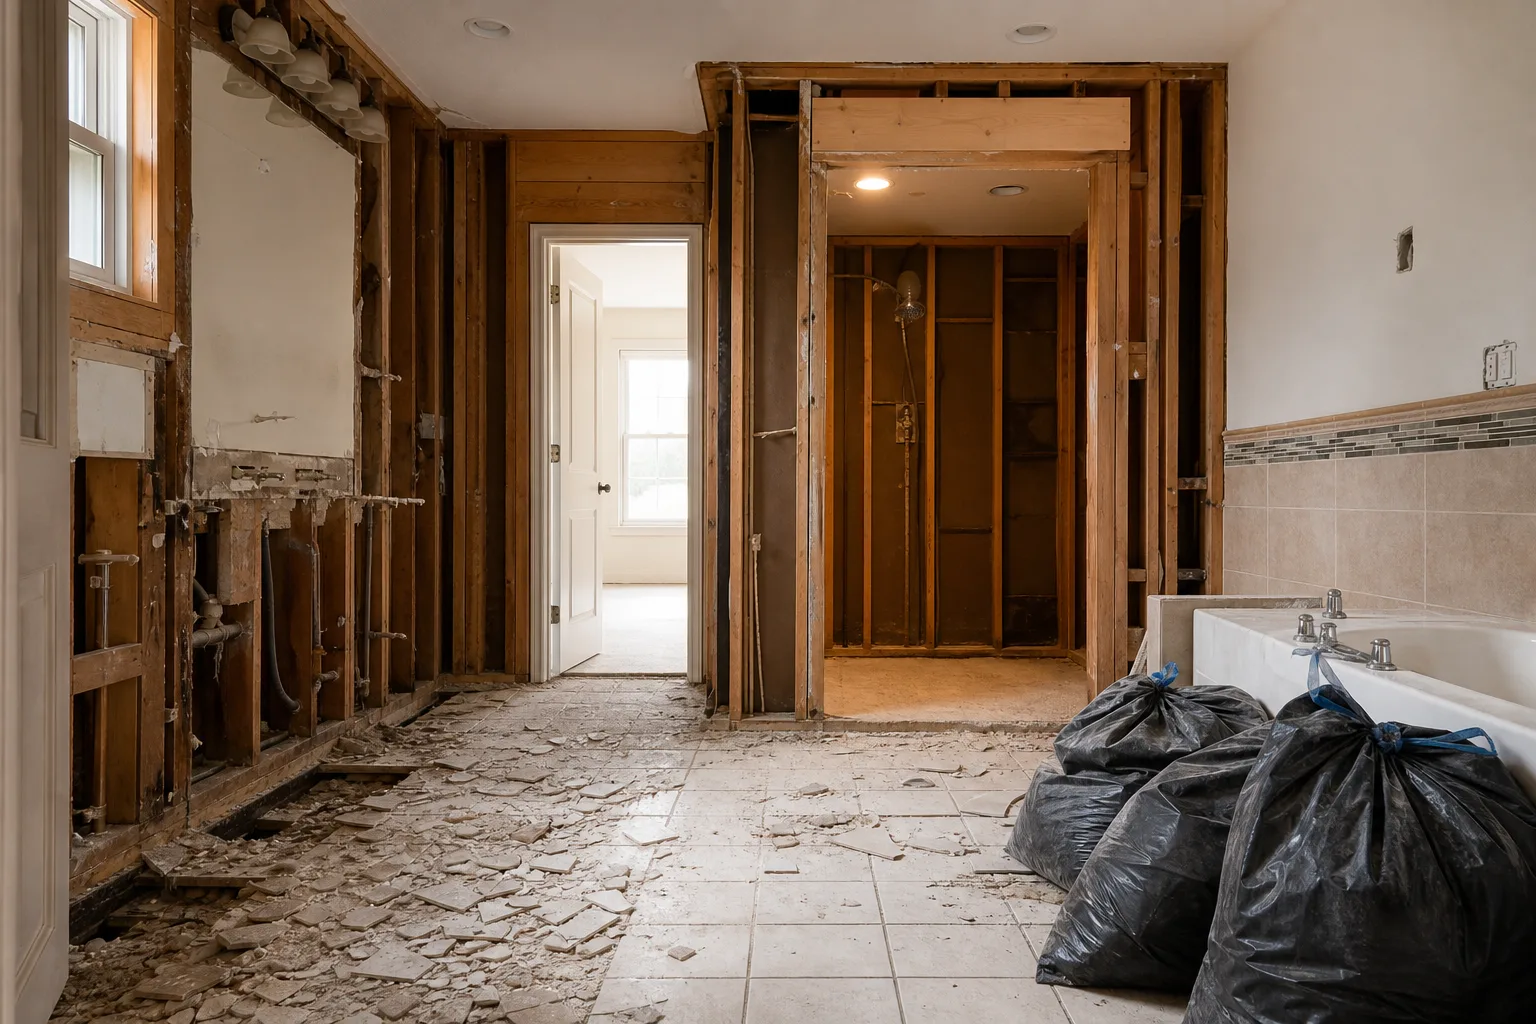
What goes into a bathroom wall before the tile is applied is more consequential than any tile choice. The substrate, the waterproofing system, the movement joints, and the ventilation path together determine whether the room lasts five years or fifty, and all of those decisions are made before the room is visible.
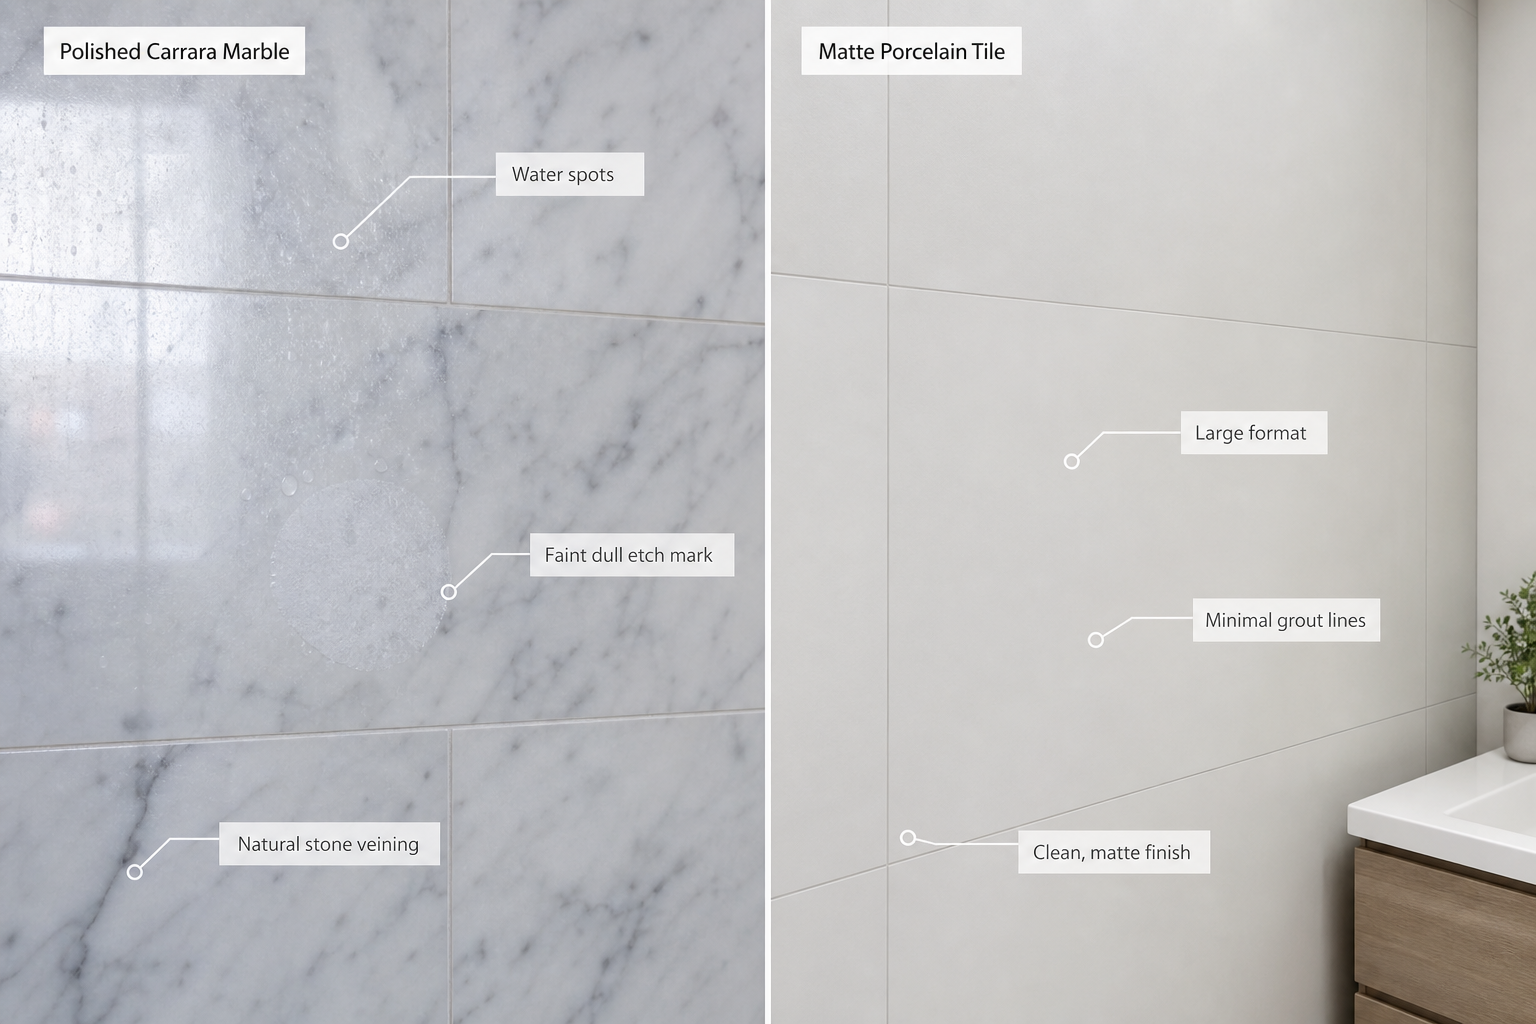
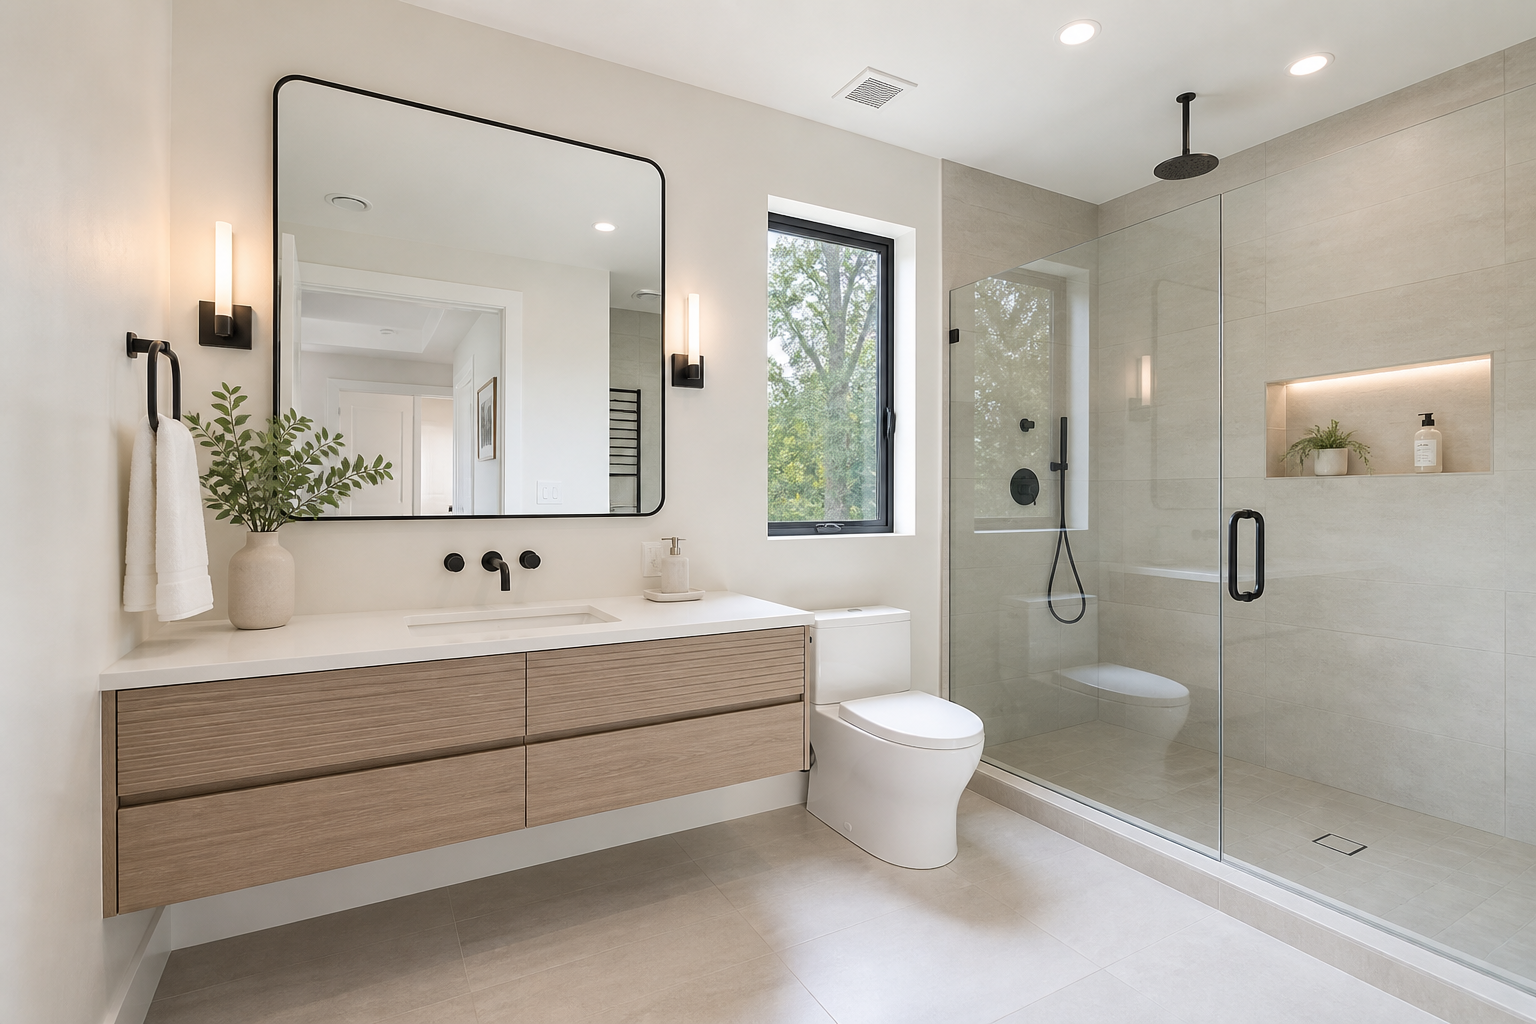
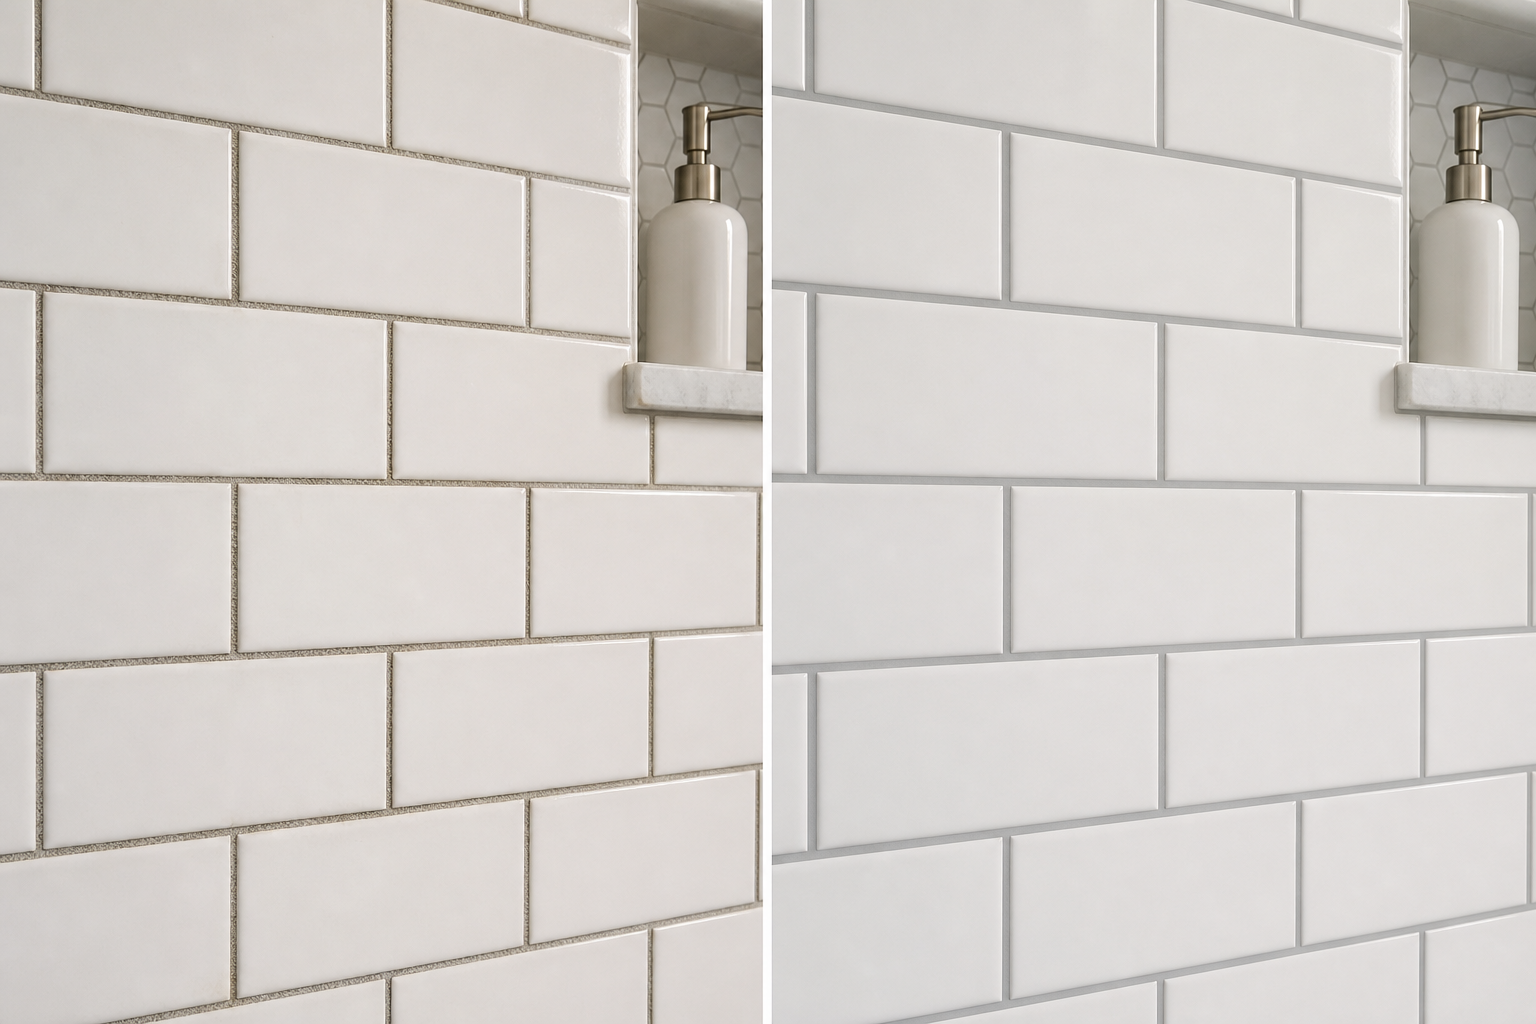
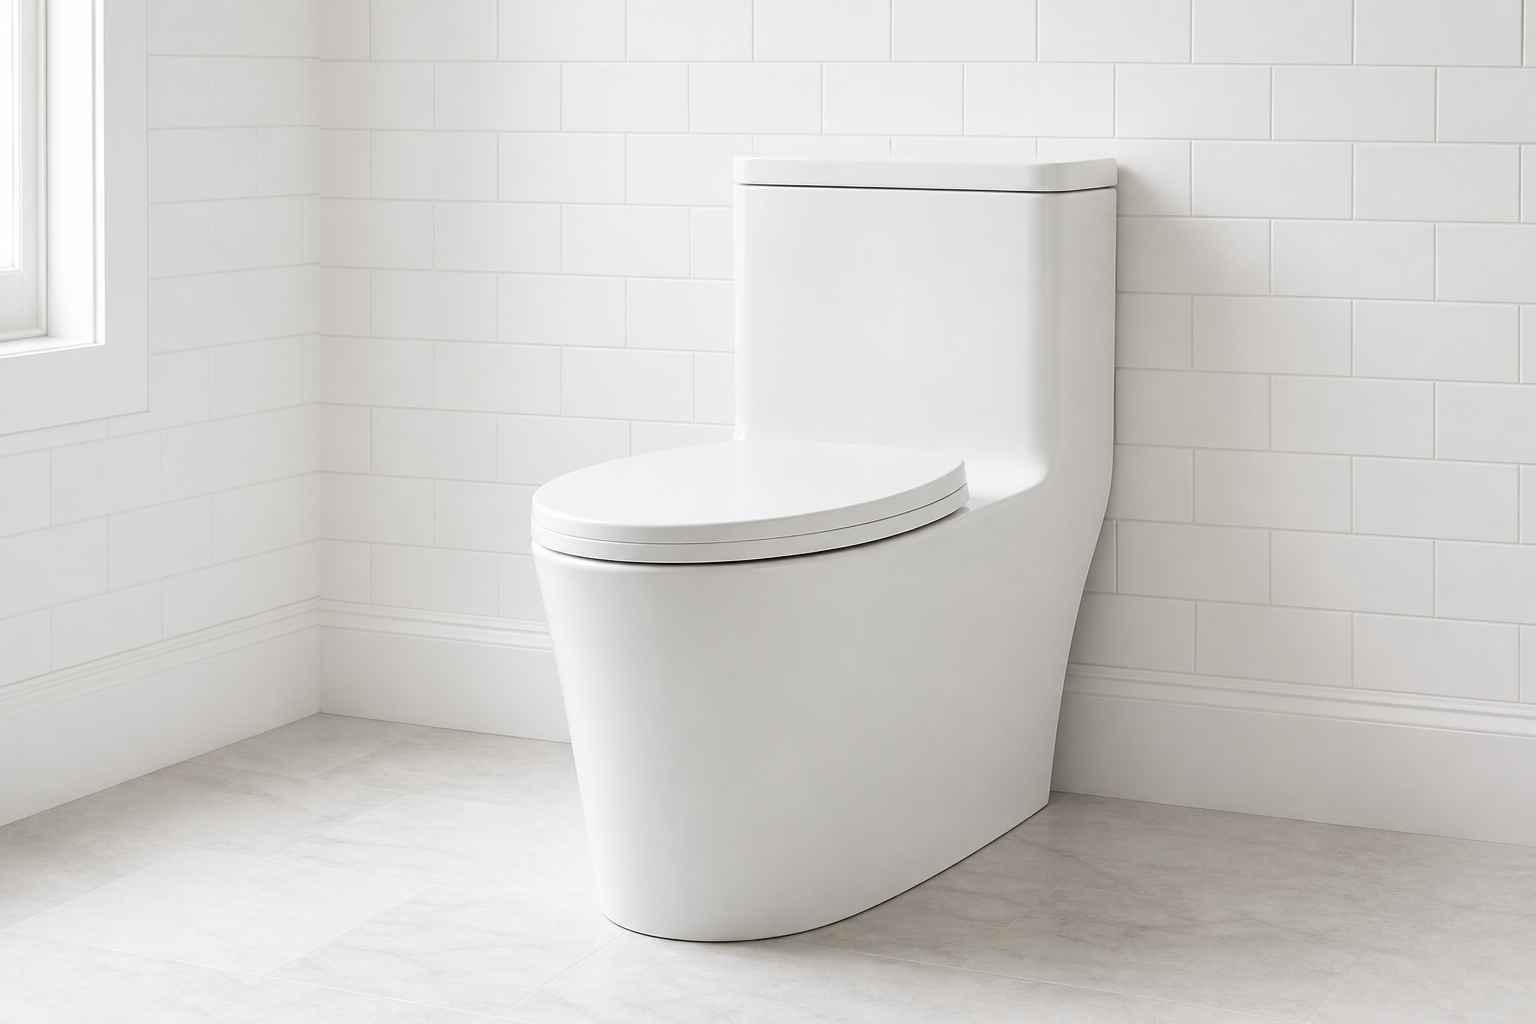
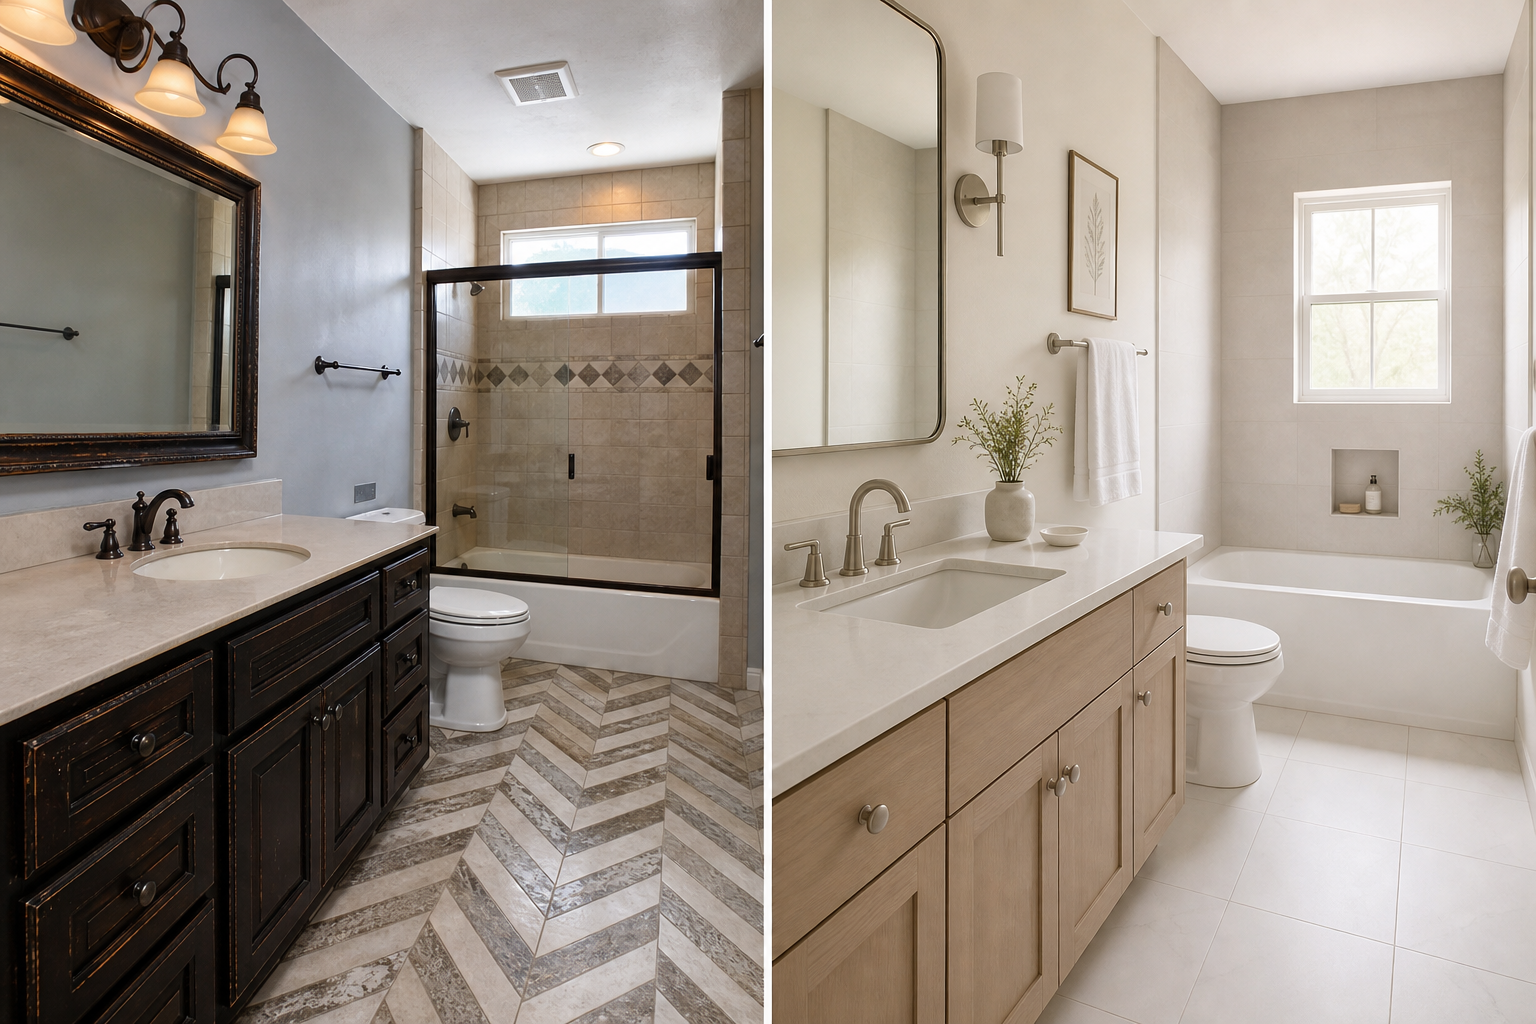
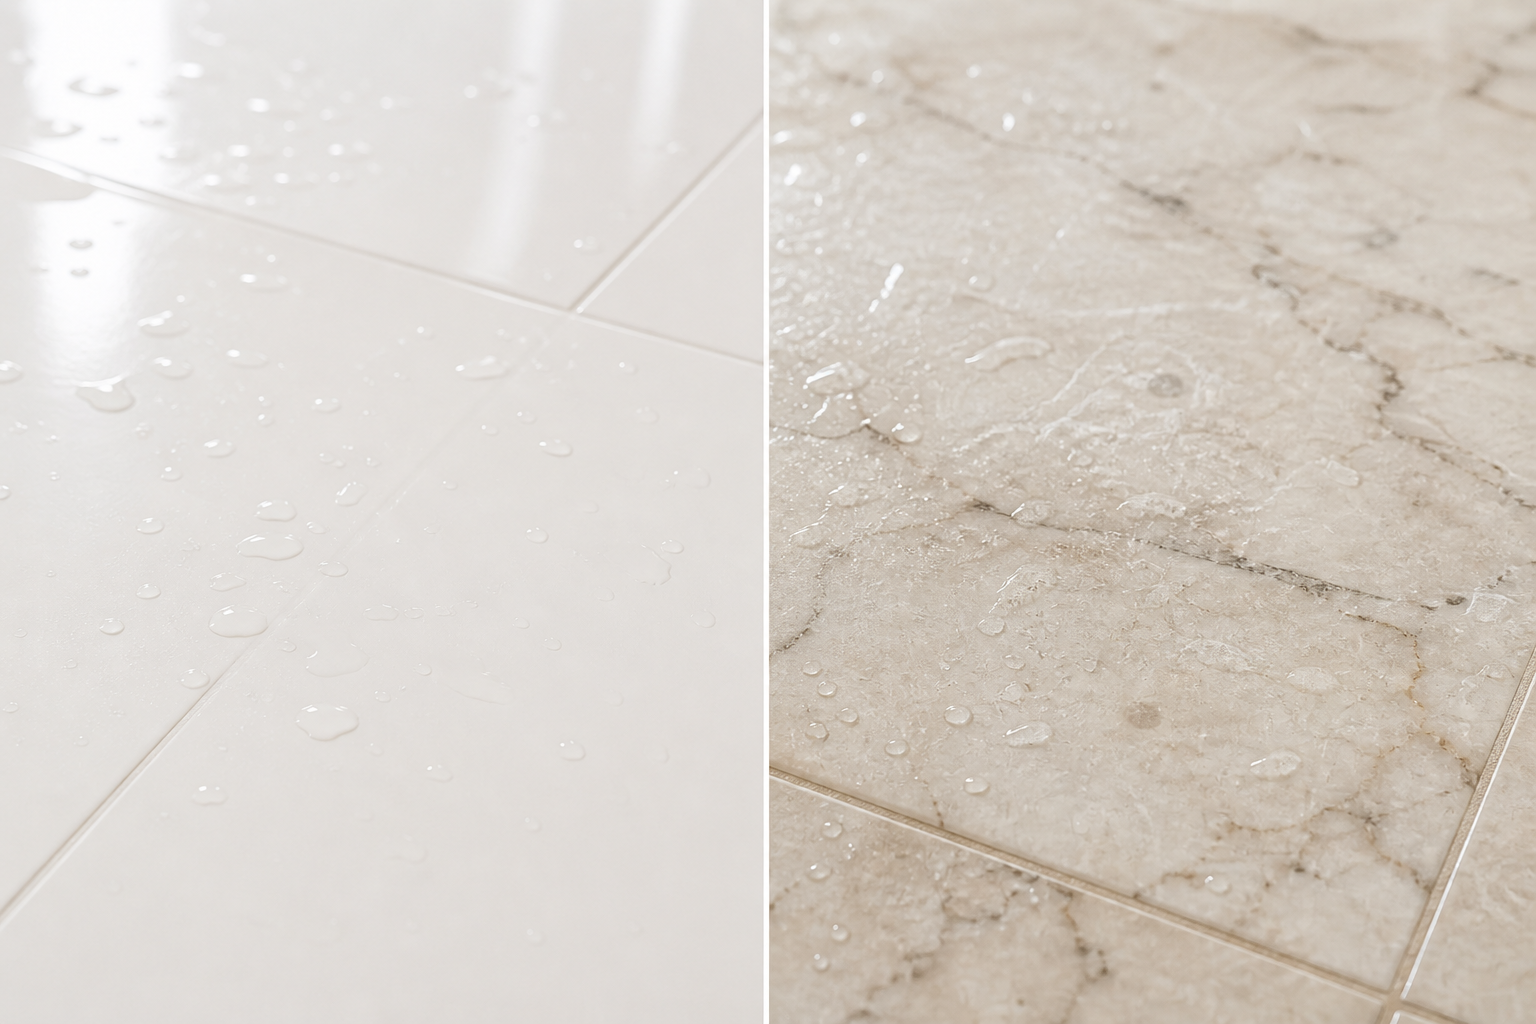
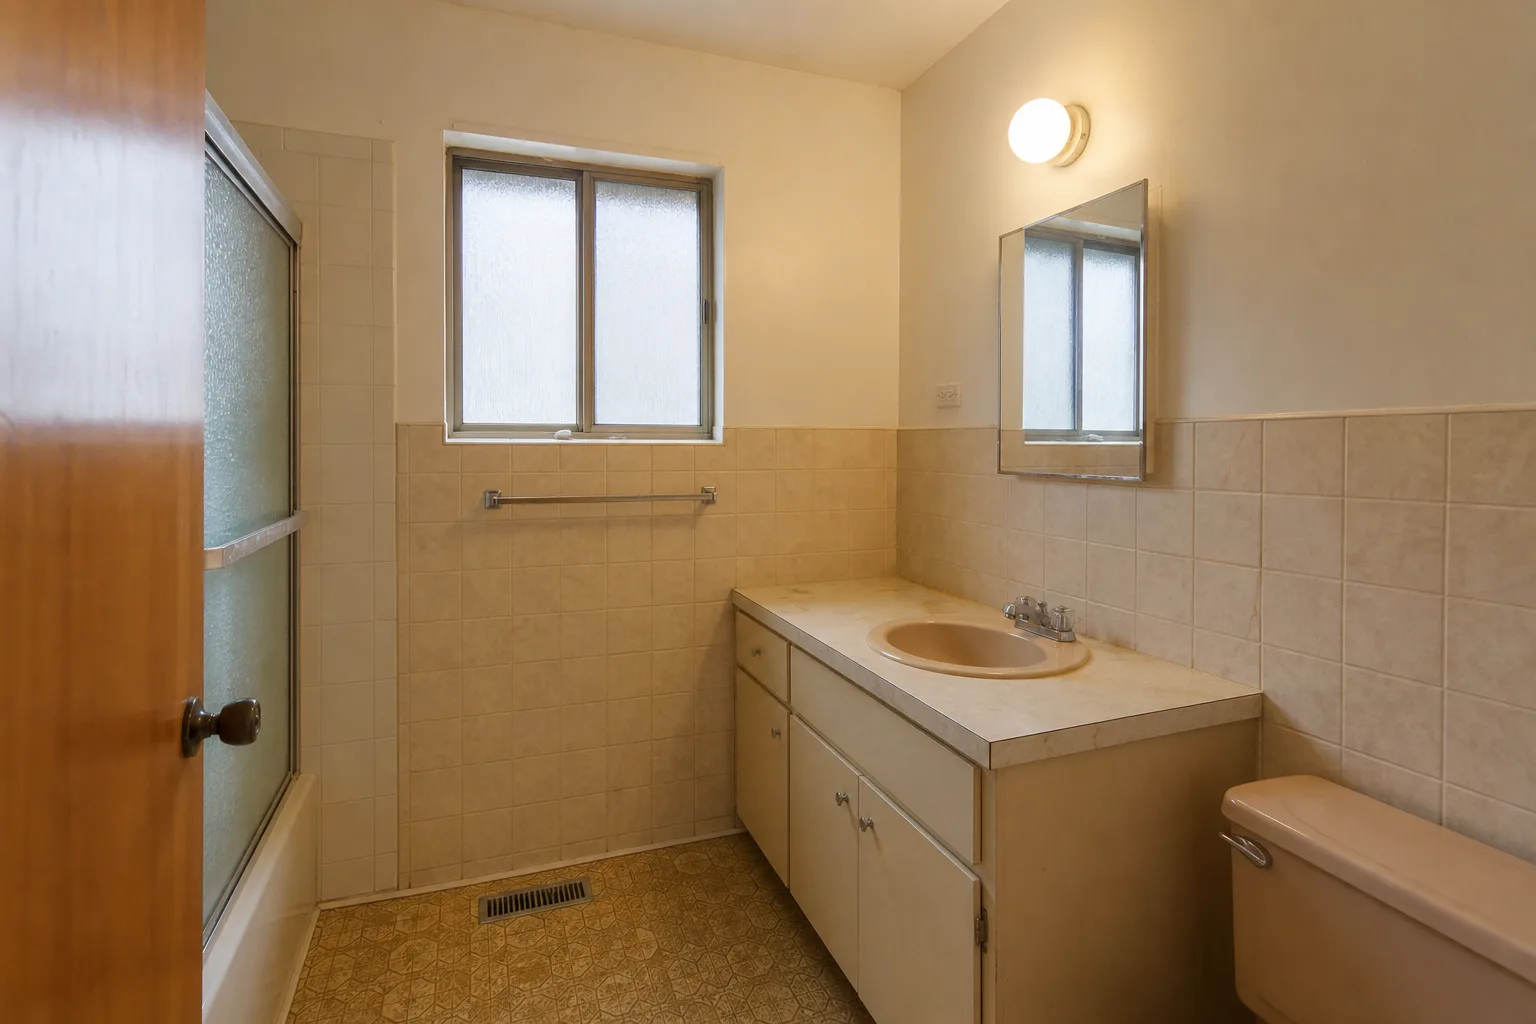
Homeowners spend weeks on tile. They compare porcelain against natural stone, debate grout color, and weigh large format against mosaic accent bands. Those choices matter for maintenance, proportion, and how the room feels in ten years. They do not matter for whether water reaches the framing. That outcome was largely decided when someone chose the backer board, specified the membrane, located the drain connection, and determined how the wall cavity would dry. By the time the tile sample board arrives, the assembly either manages moisture correctly or it does not. The tile cannot fix a wrong decision made three layers deep.
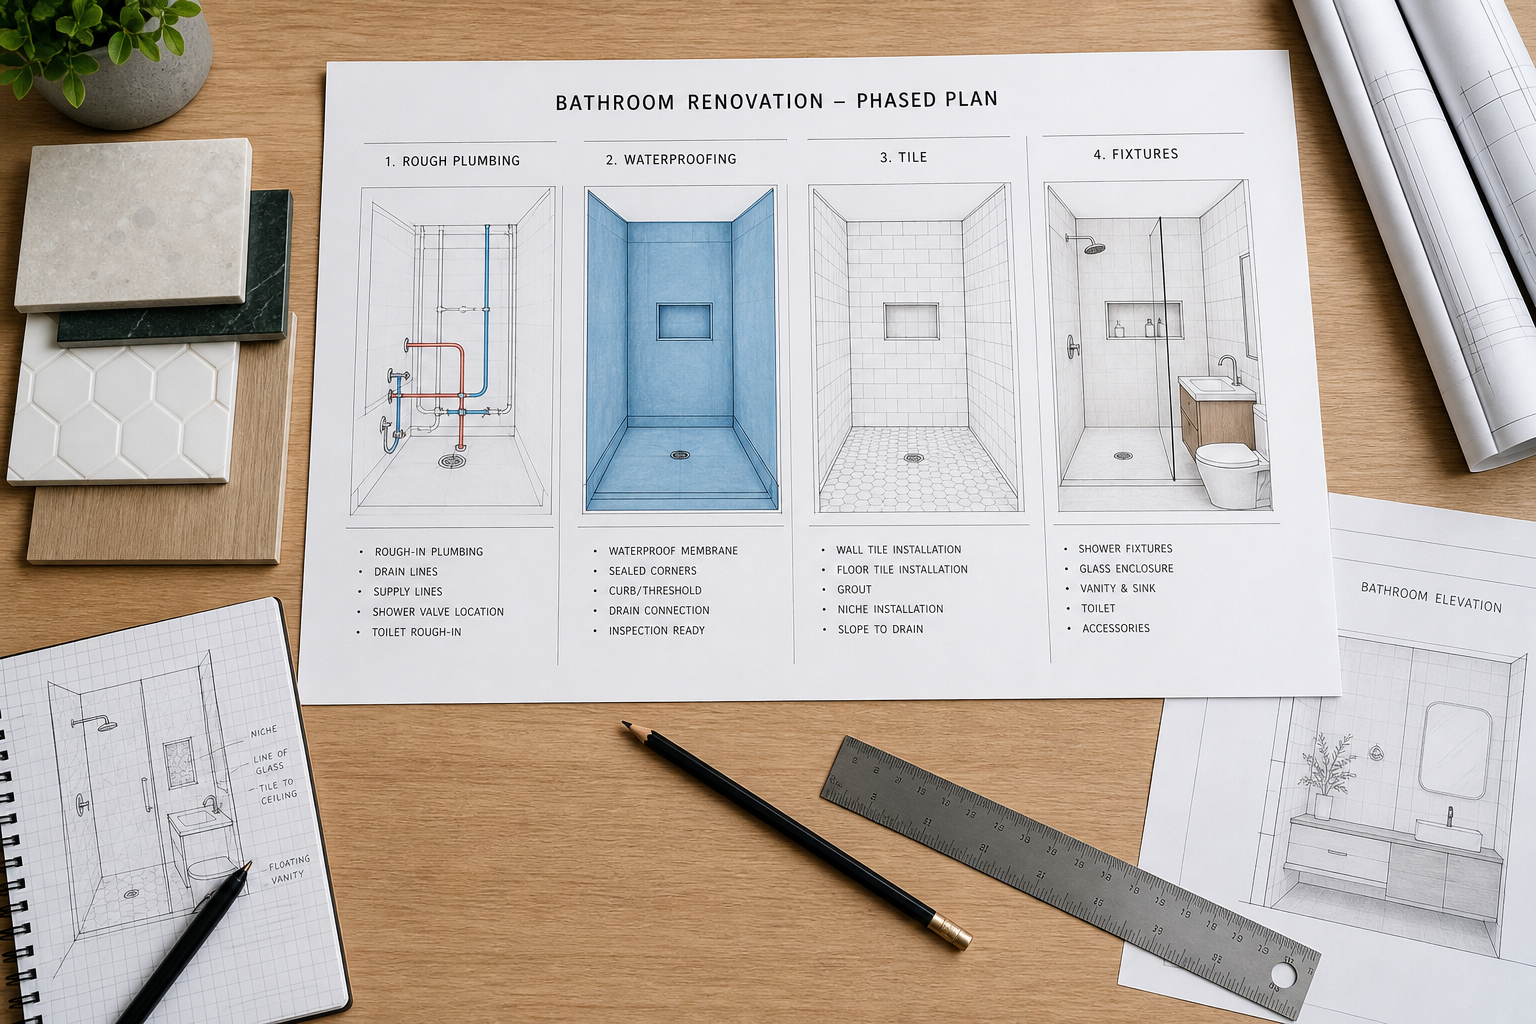
The Wall Is an Assembly, Not a Surface
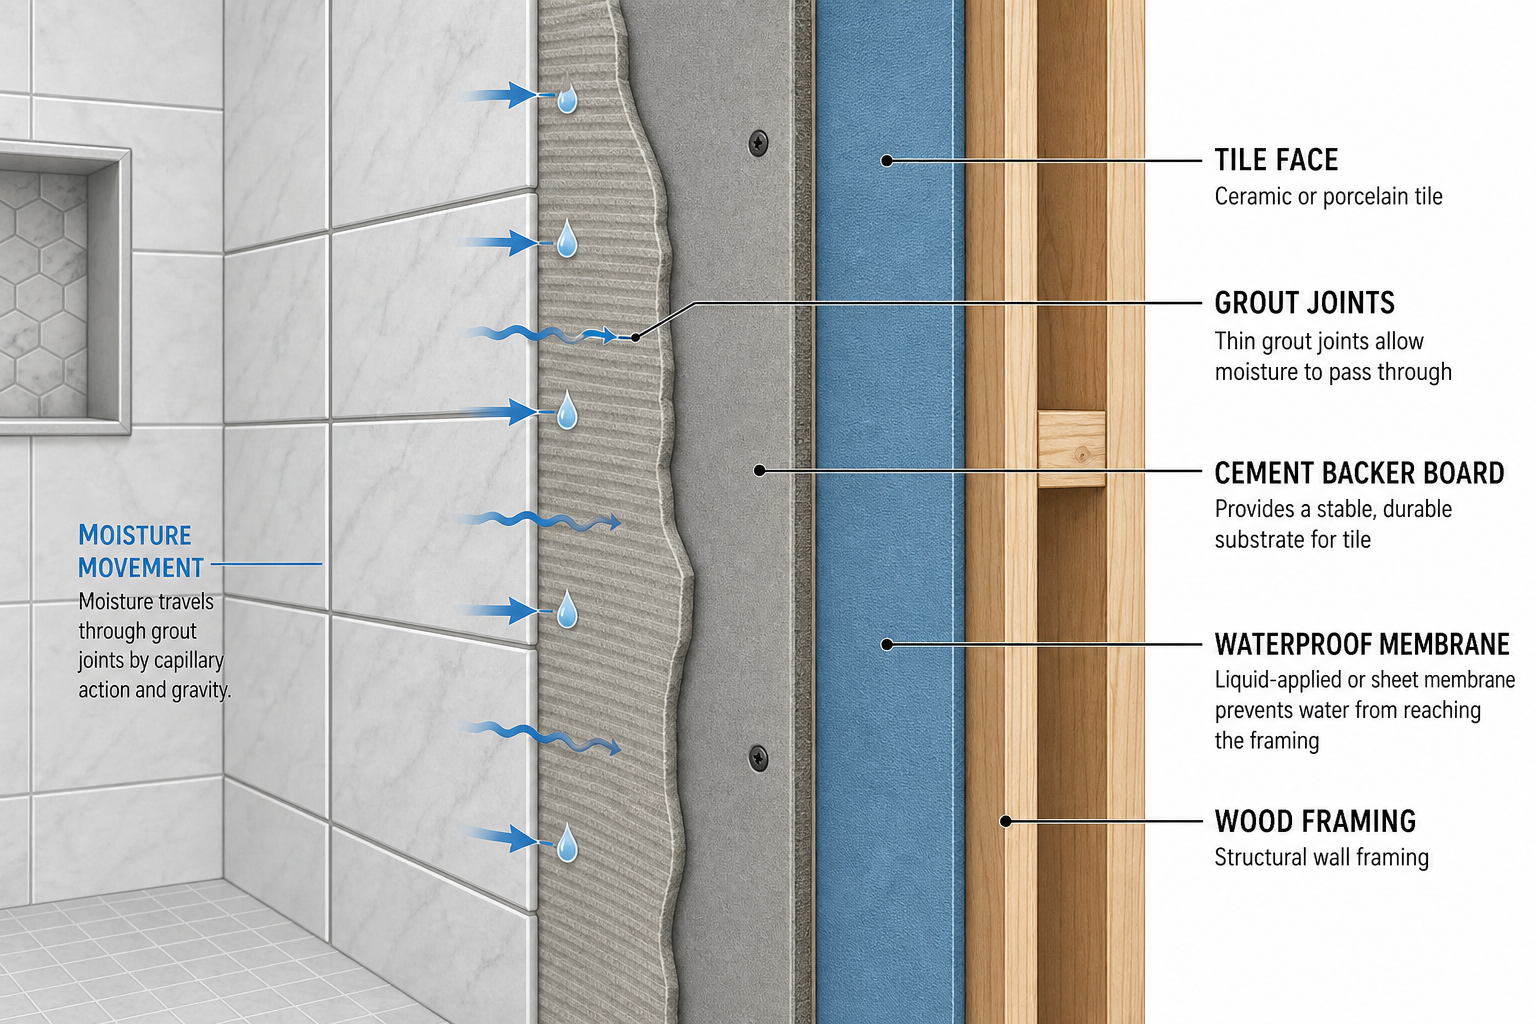
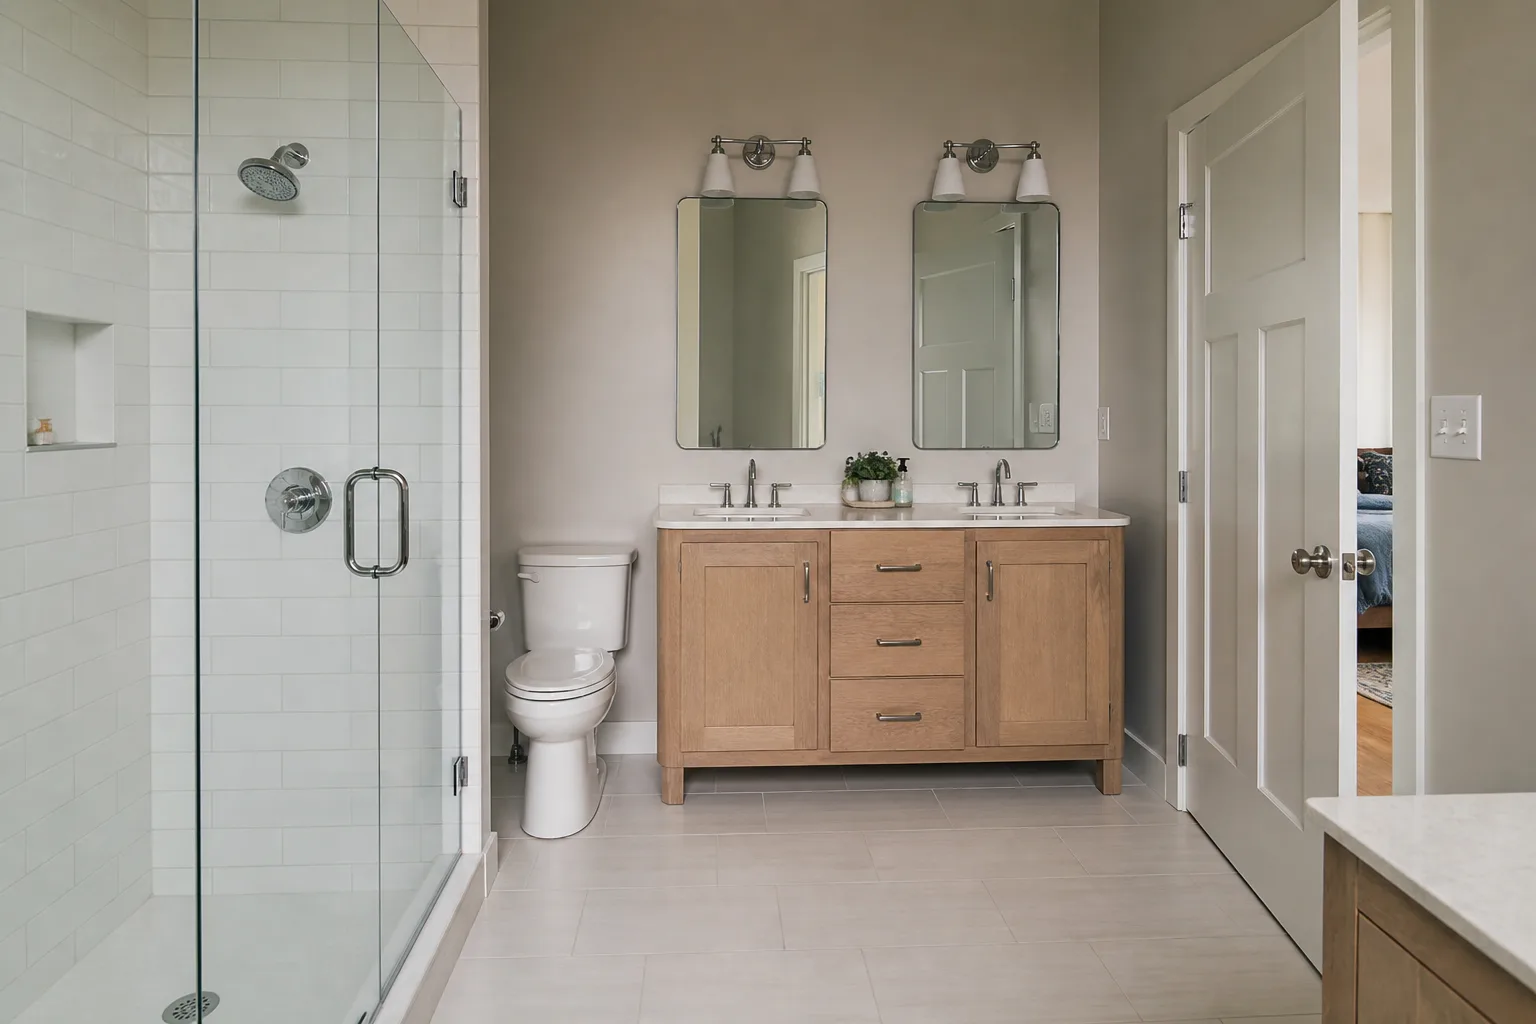
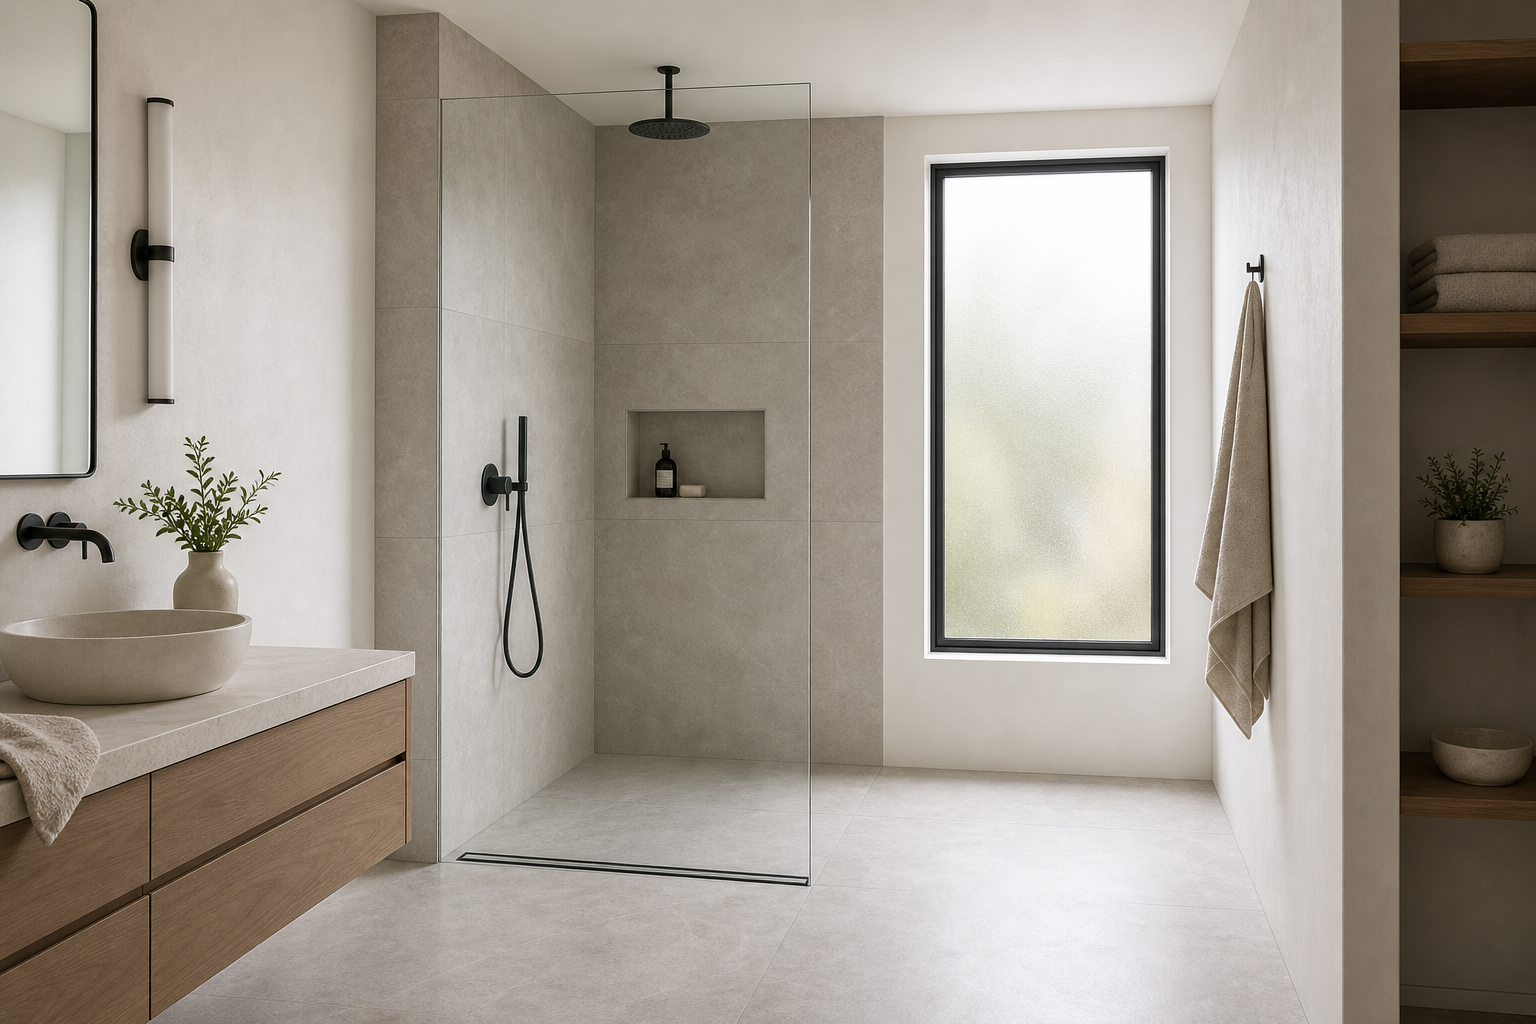
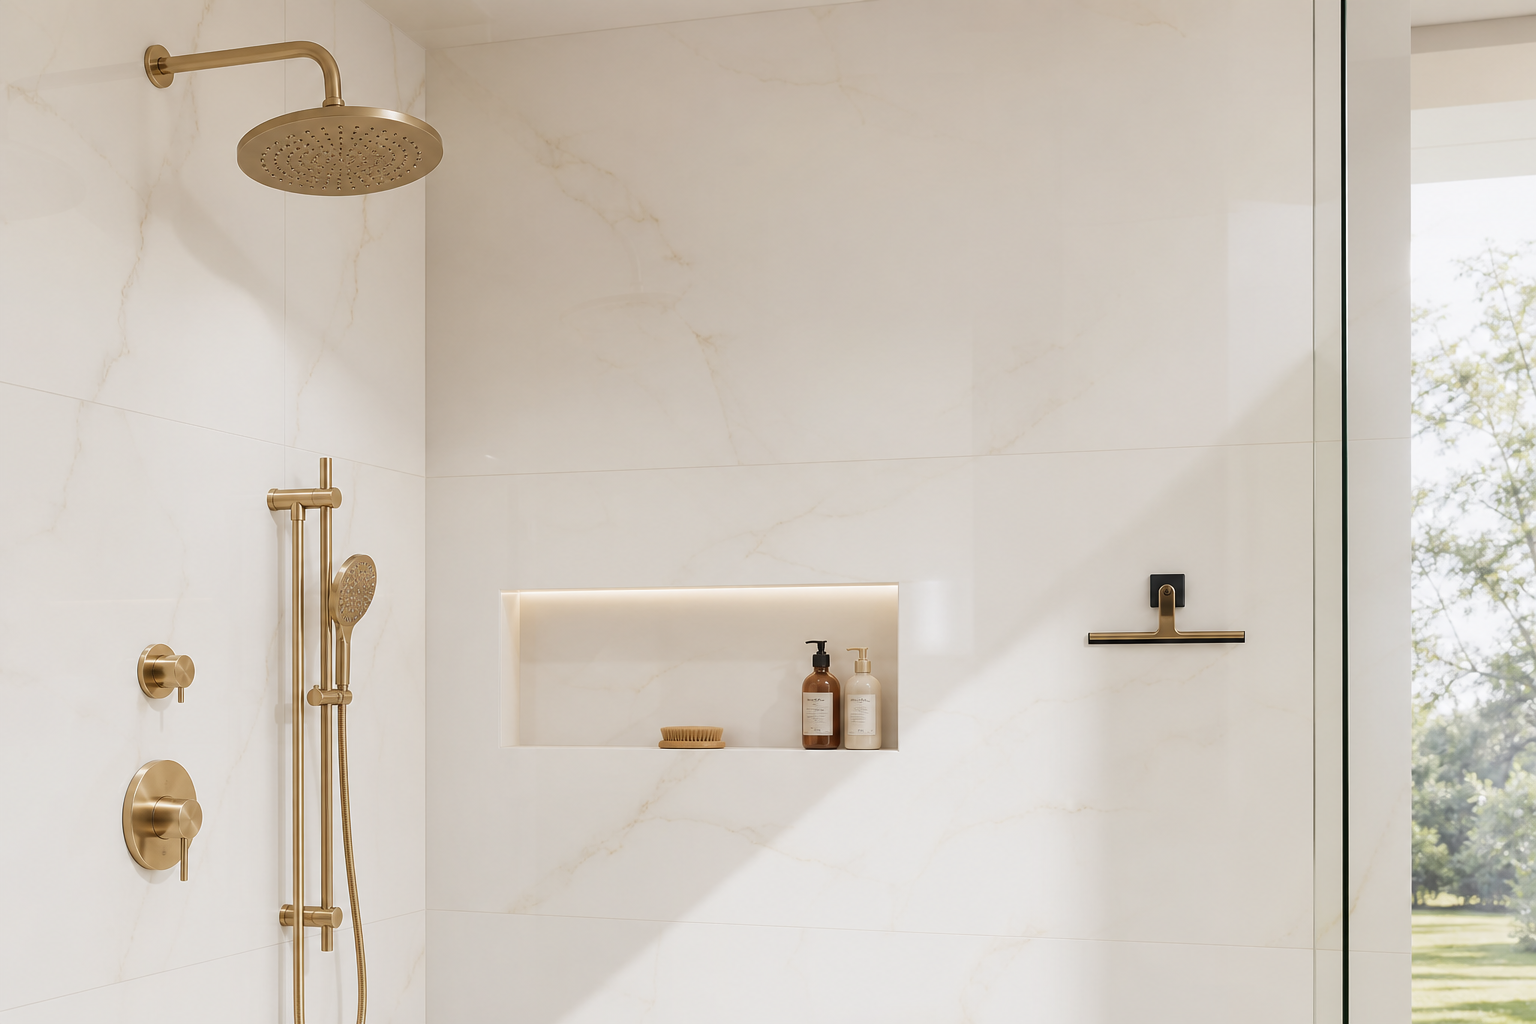
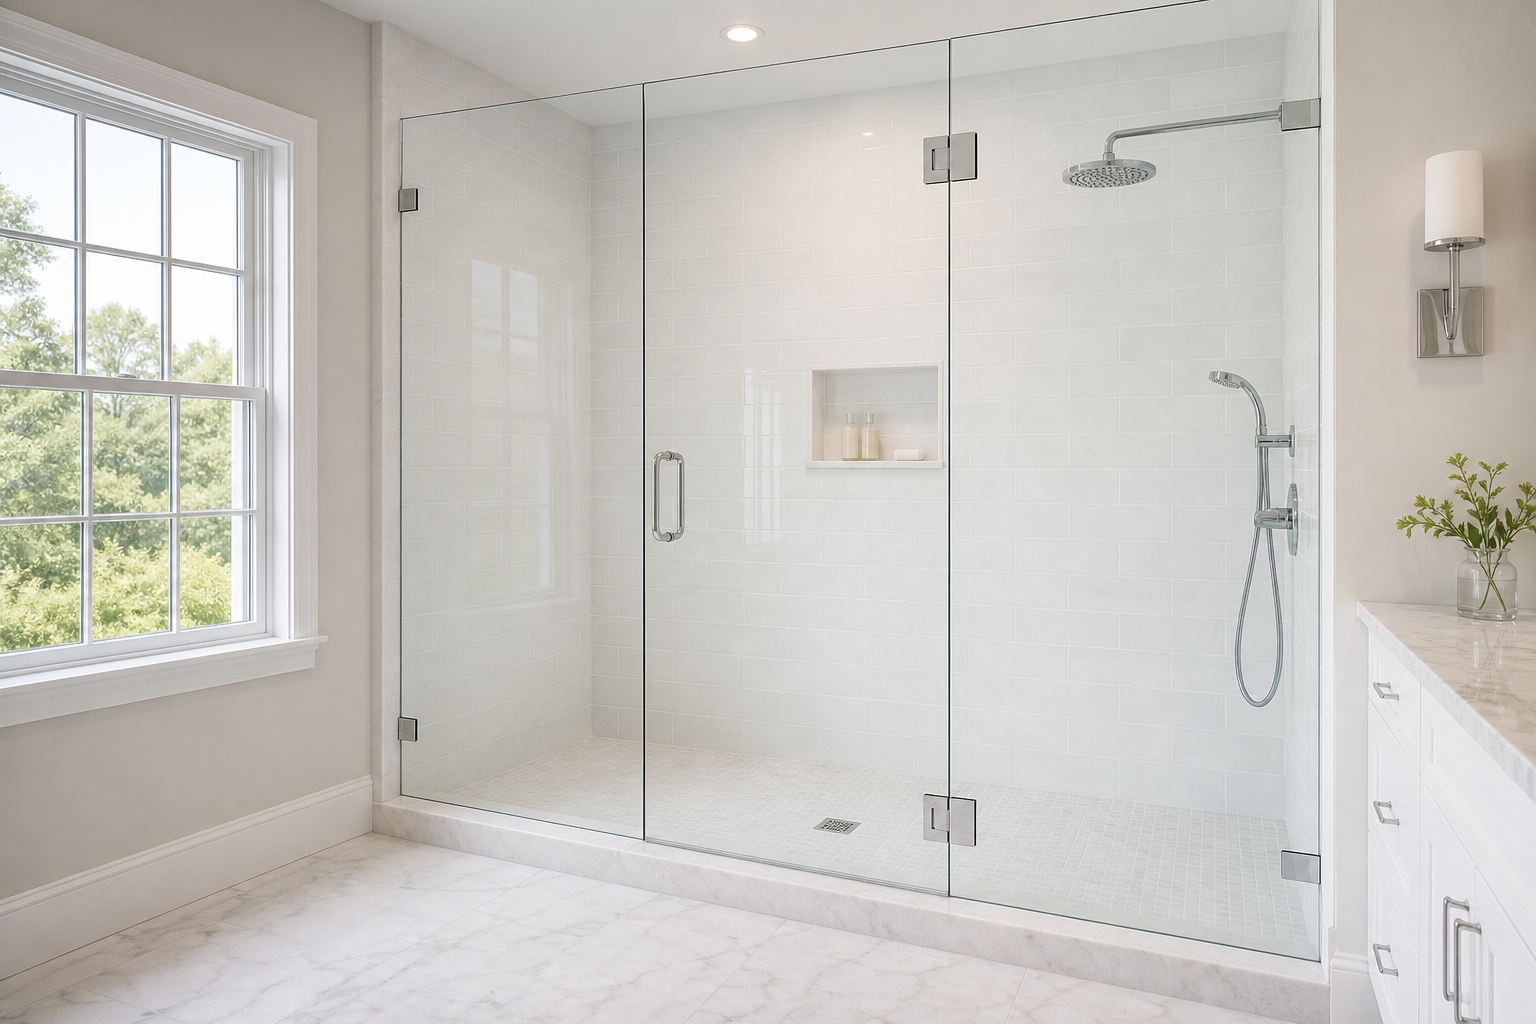
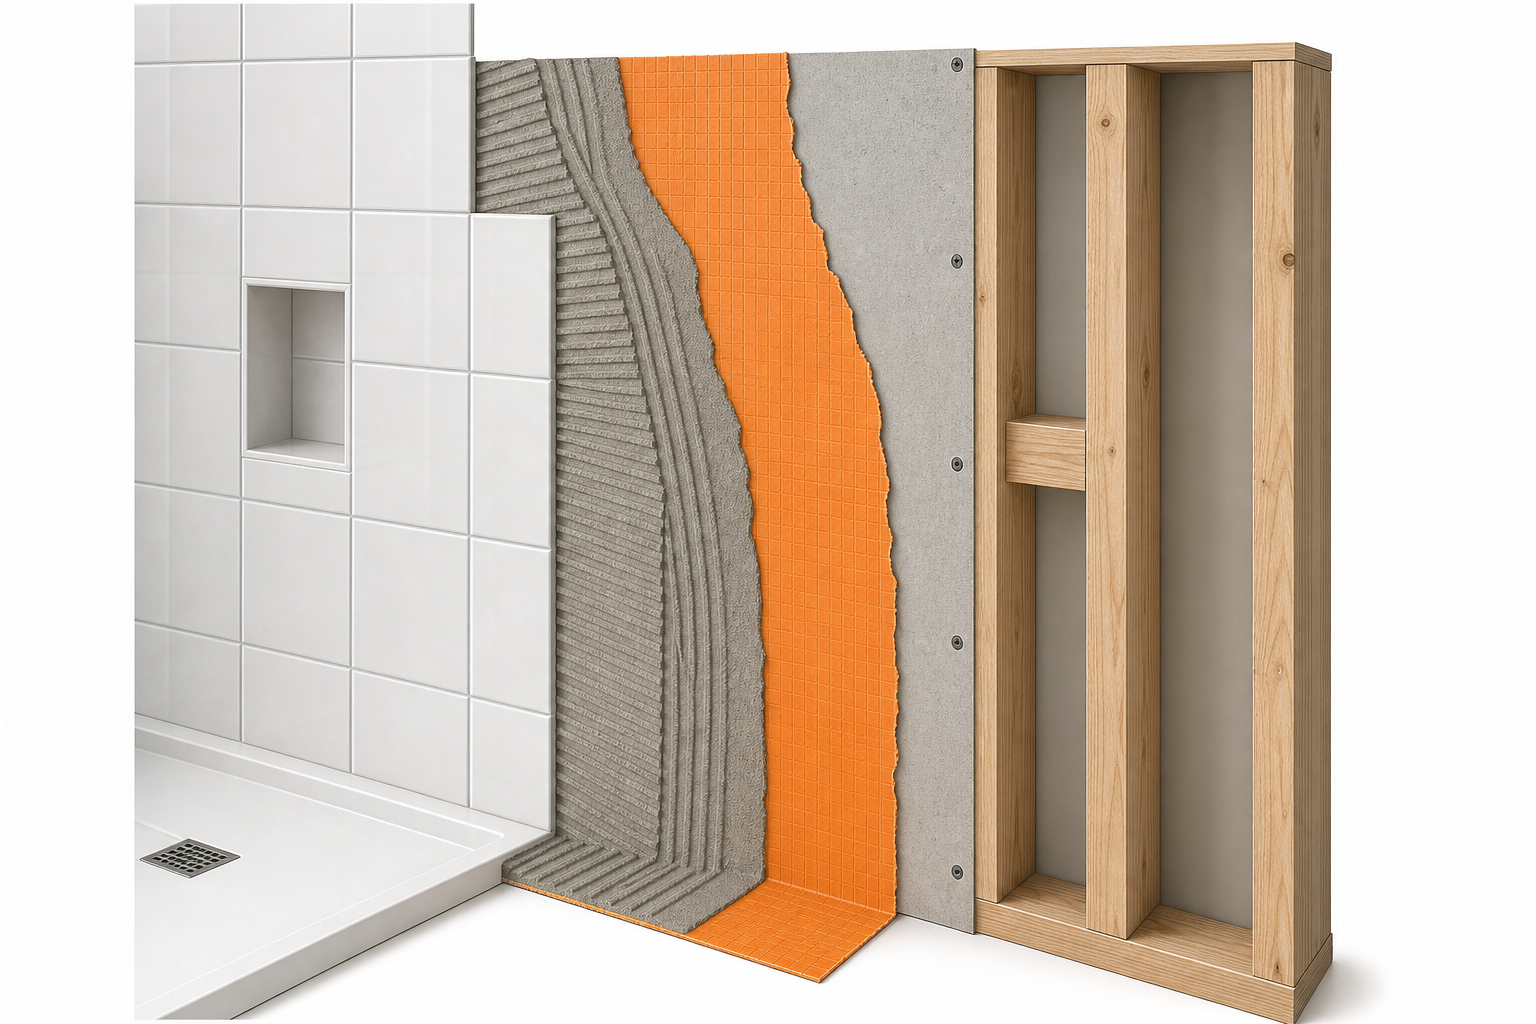
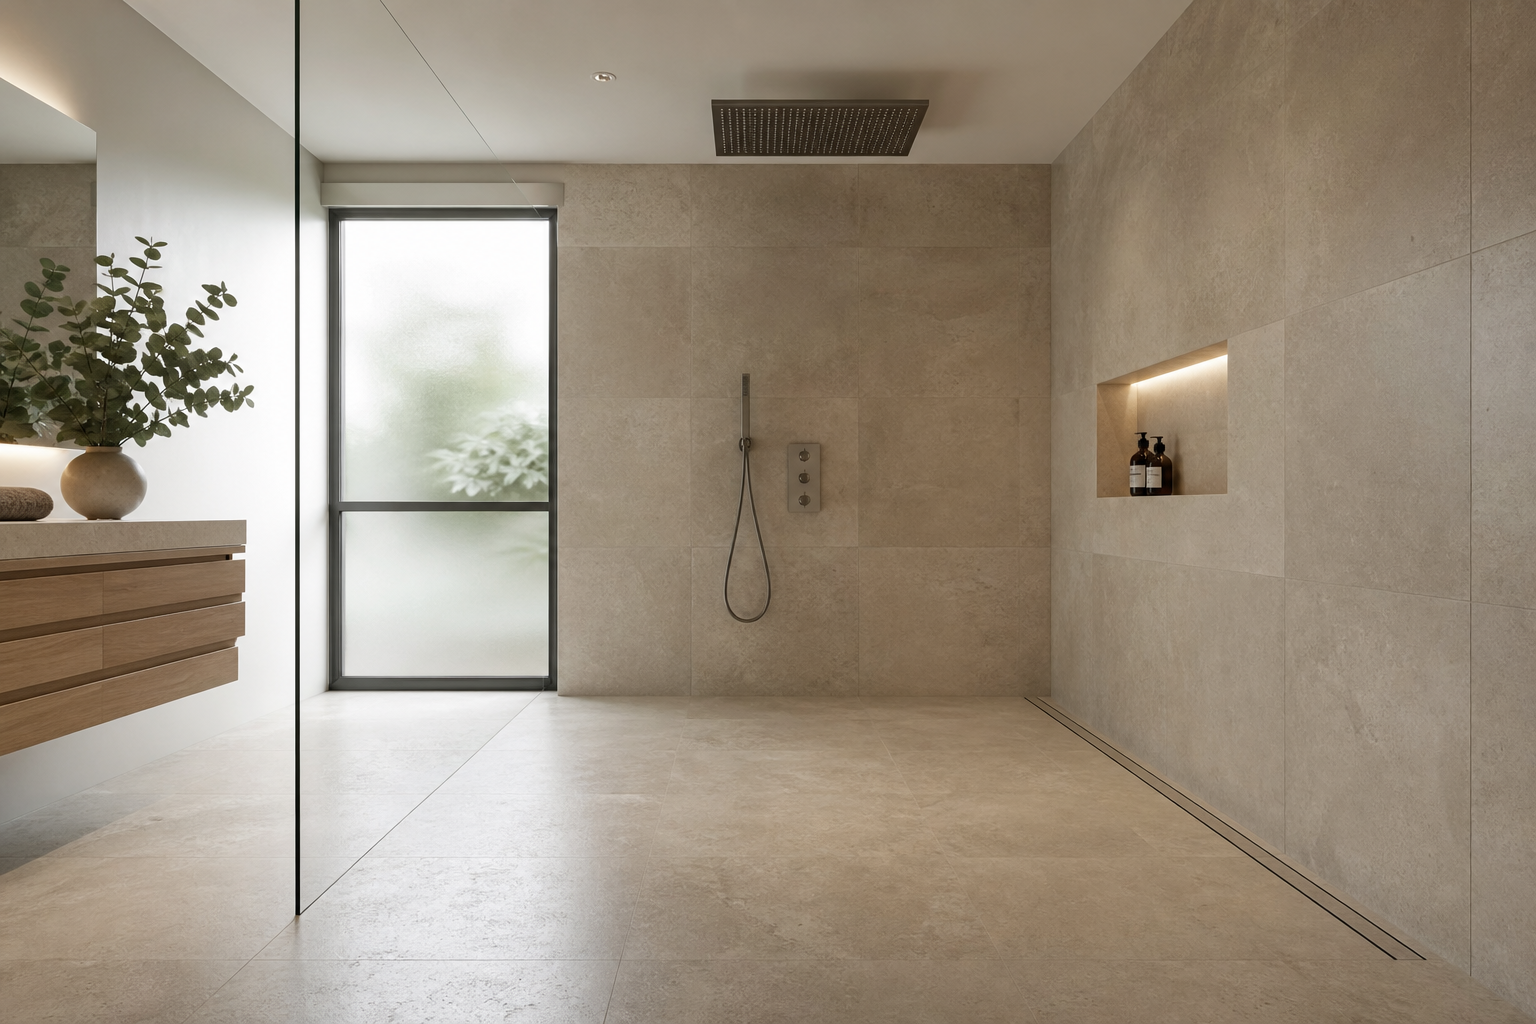
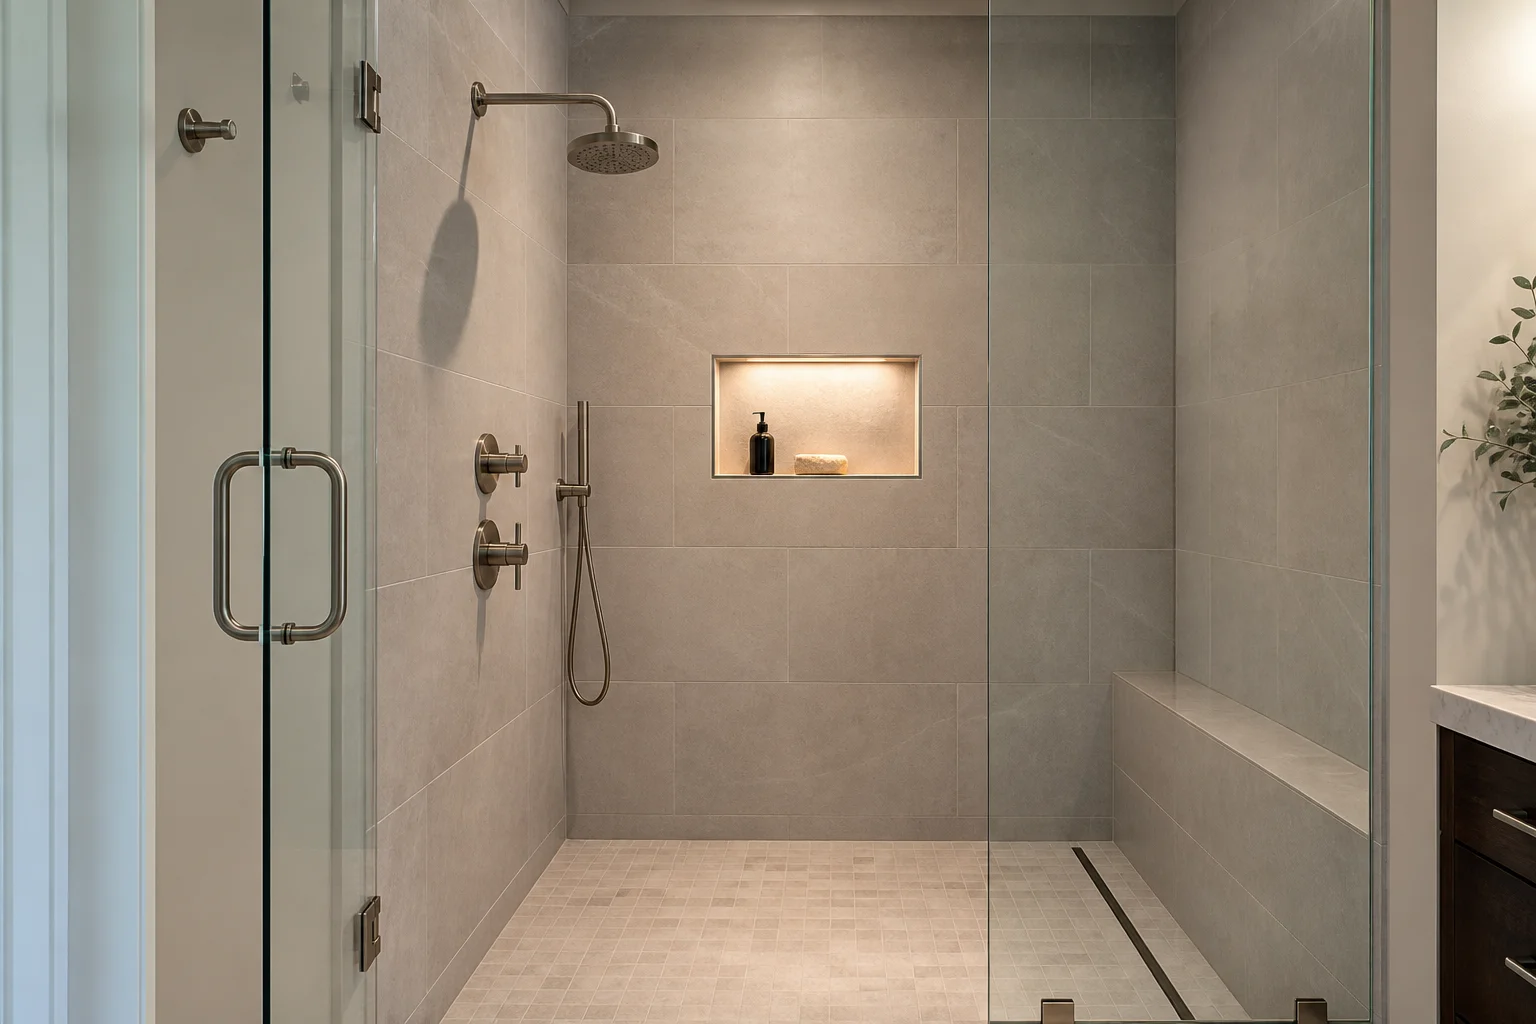
A finished shower wall presents a single plane of tile. Behind that plane is a stack of materials, each with a defined job, and each capable of compromising the layers above or below it if specified or installed incorrectly.
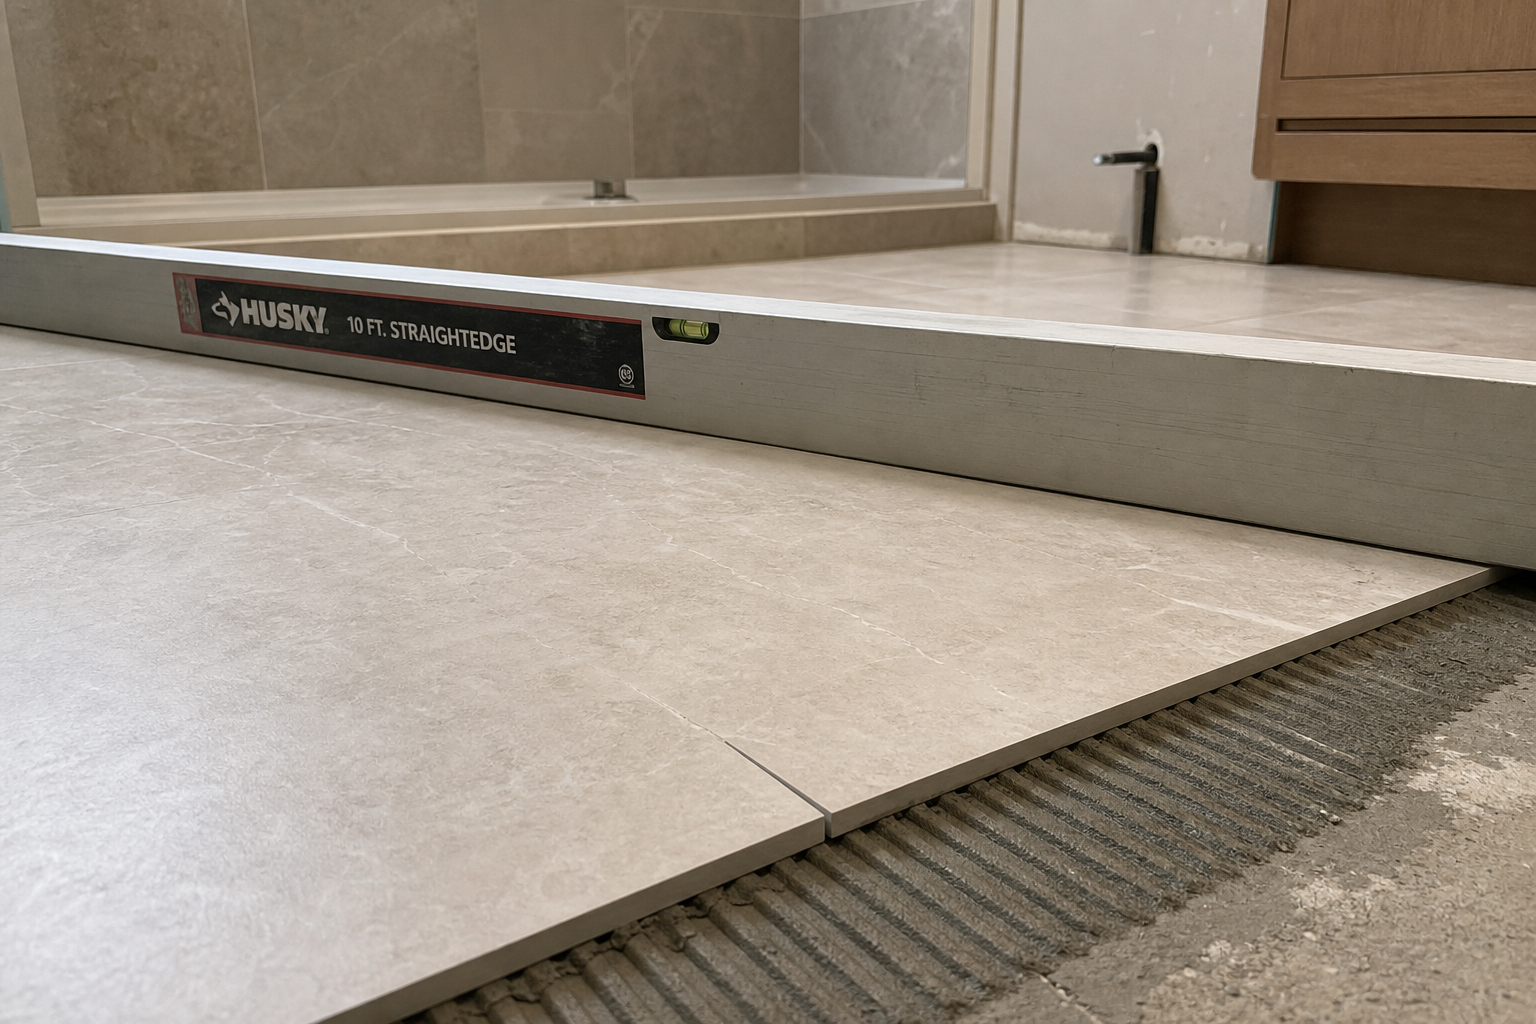
At the structural layer, wood or metal studs form the frame. Stud spacing, blocking at fixture heights, and deflection limits matter before anything else goes up. The Tile Council of North America and ANSI flag increased cracking risk when floor or wall substrates deflect beyond L/360 of the span. A wall that flexes under load will eventually crack grout and tile regardless of how beautiful the material selection was.
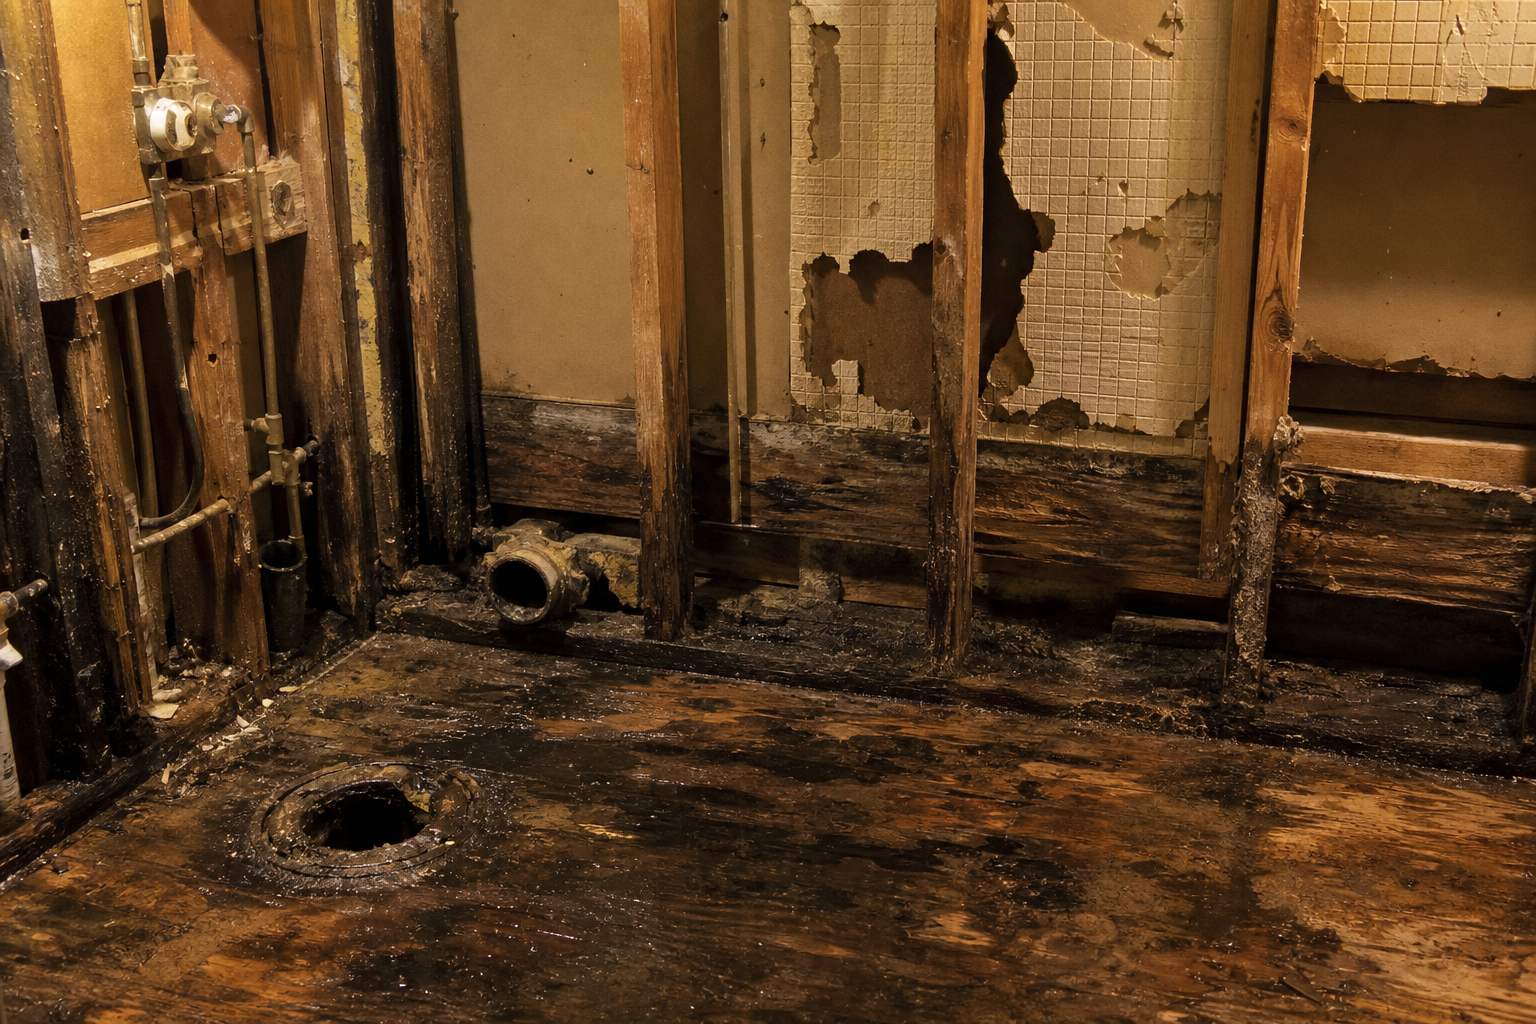
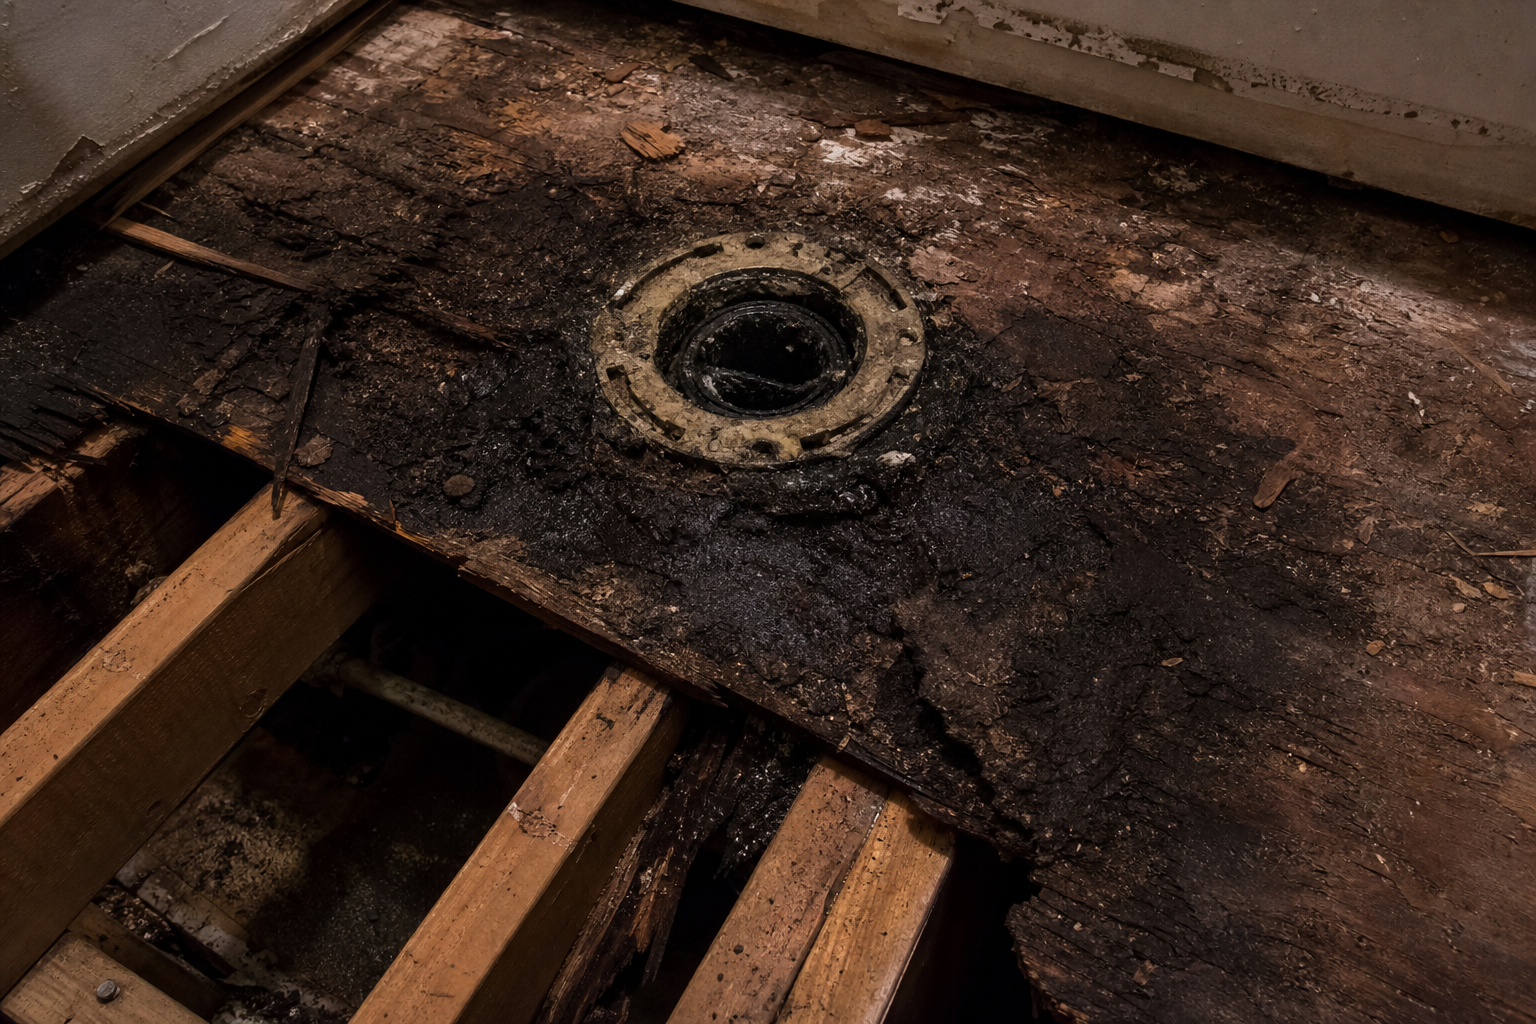
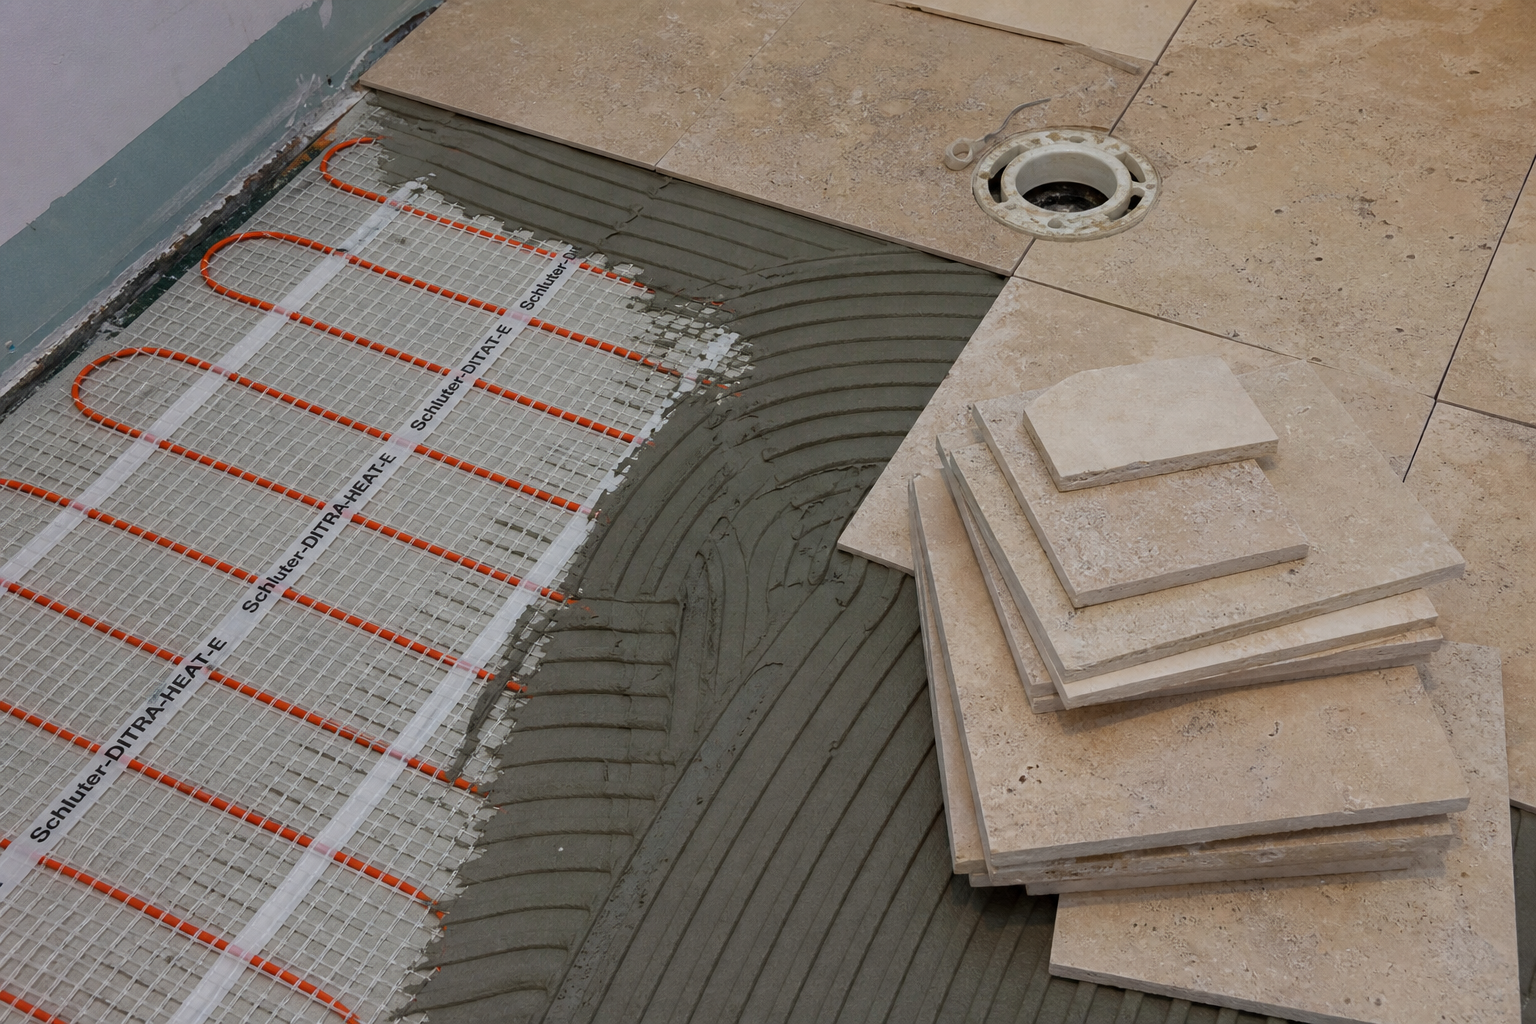
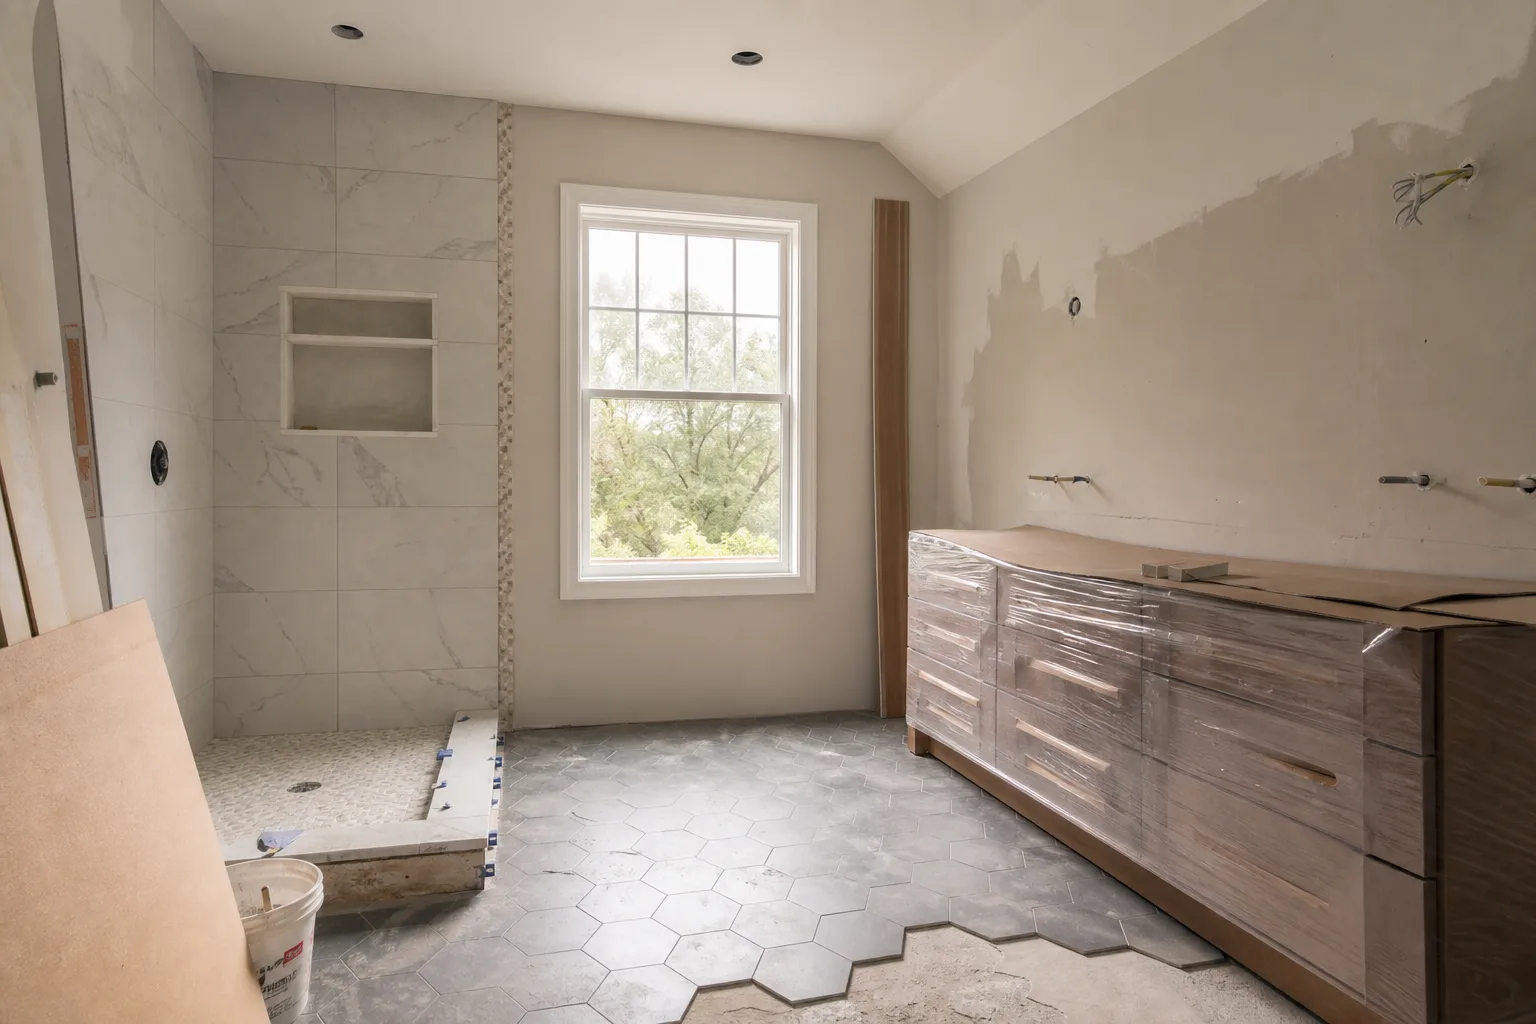
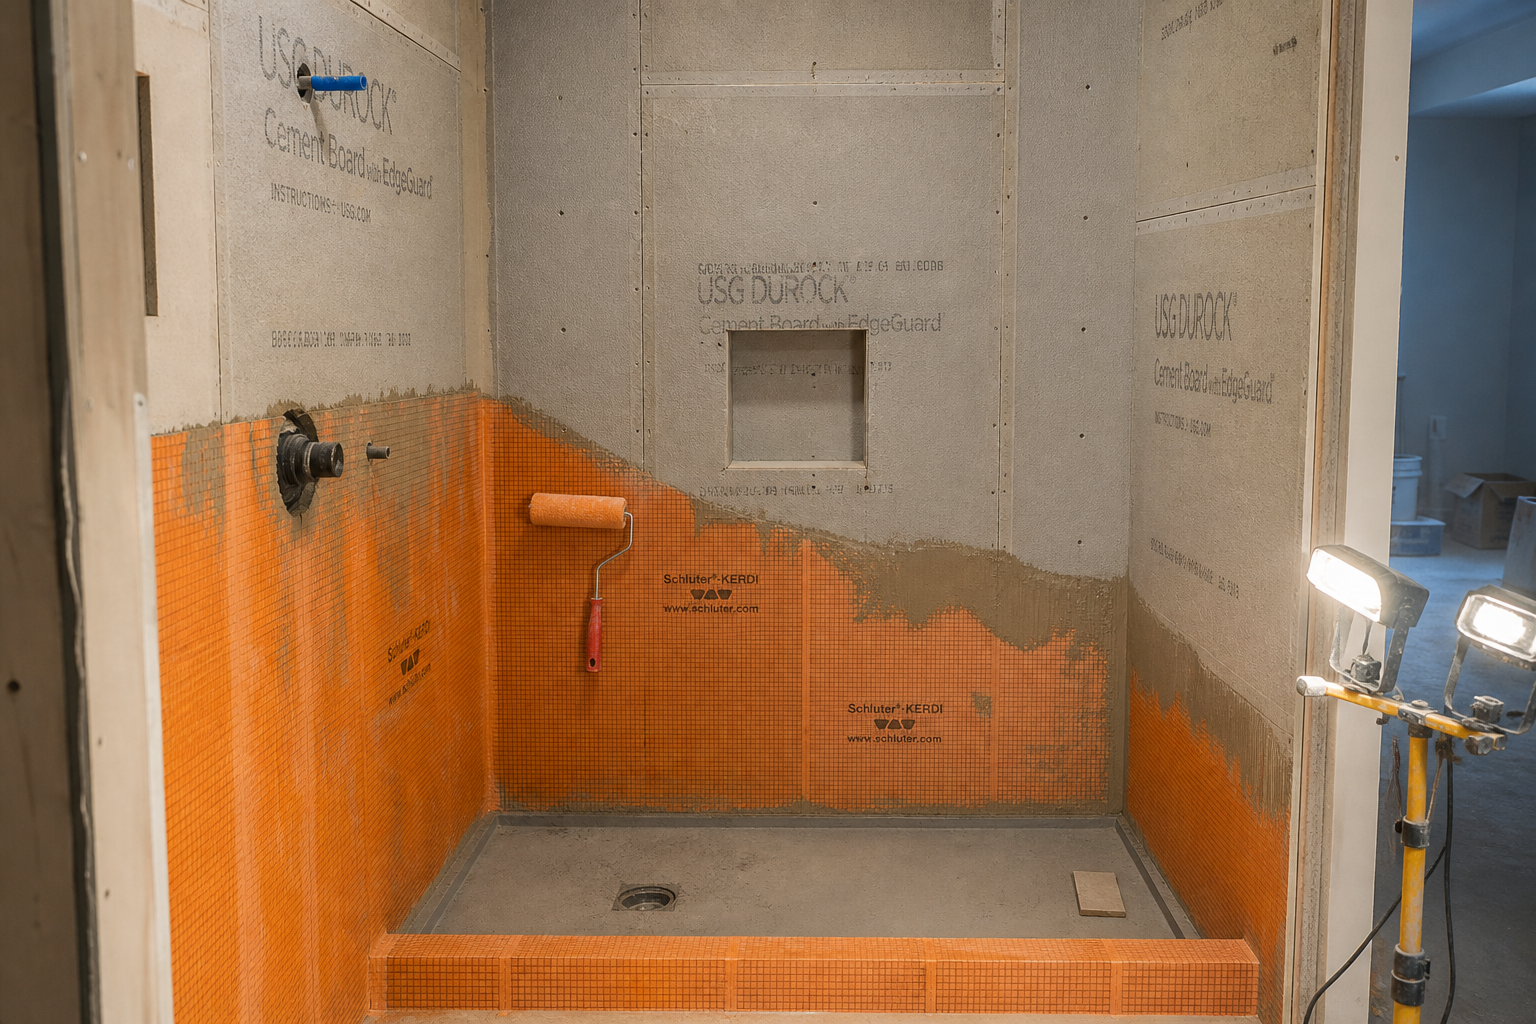
Against the studs sits the substrate. In most residential shower walls, that substrate is cement backer board compliant with ASTM C1325 or C1288. Cement board provides a rigid, dimensionally stable surface for tile adhesion. It is water-resistant, meaning it tolerates moisture without disintegrating. It is not waterproof. Without a separate membrane on its face, water that passes through grout and mortar will enter the board, migrate through it, and reach the stud cavity behind.
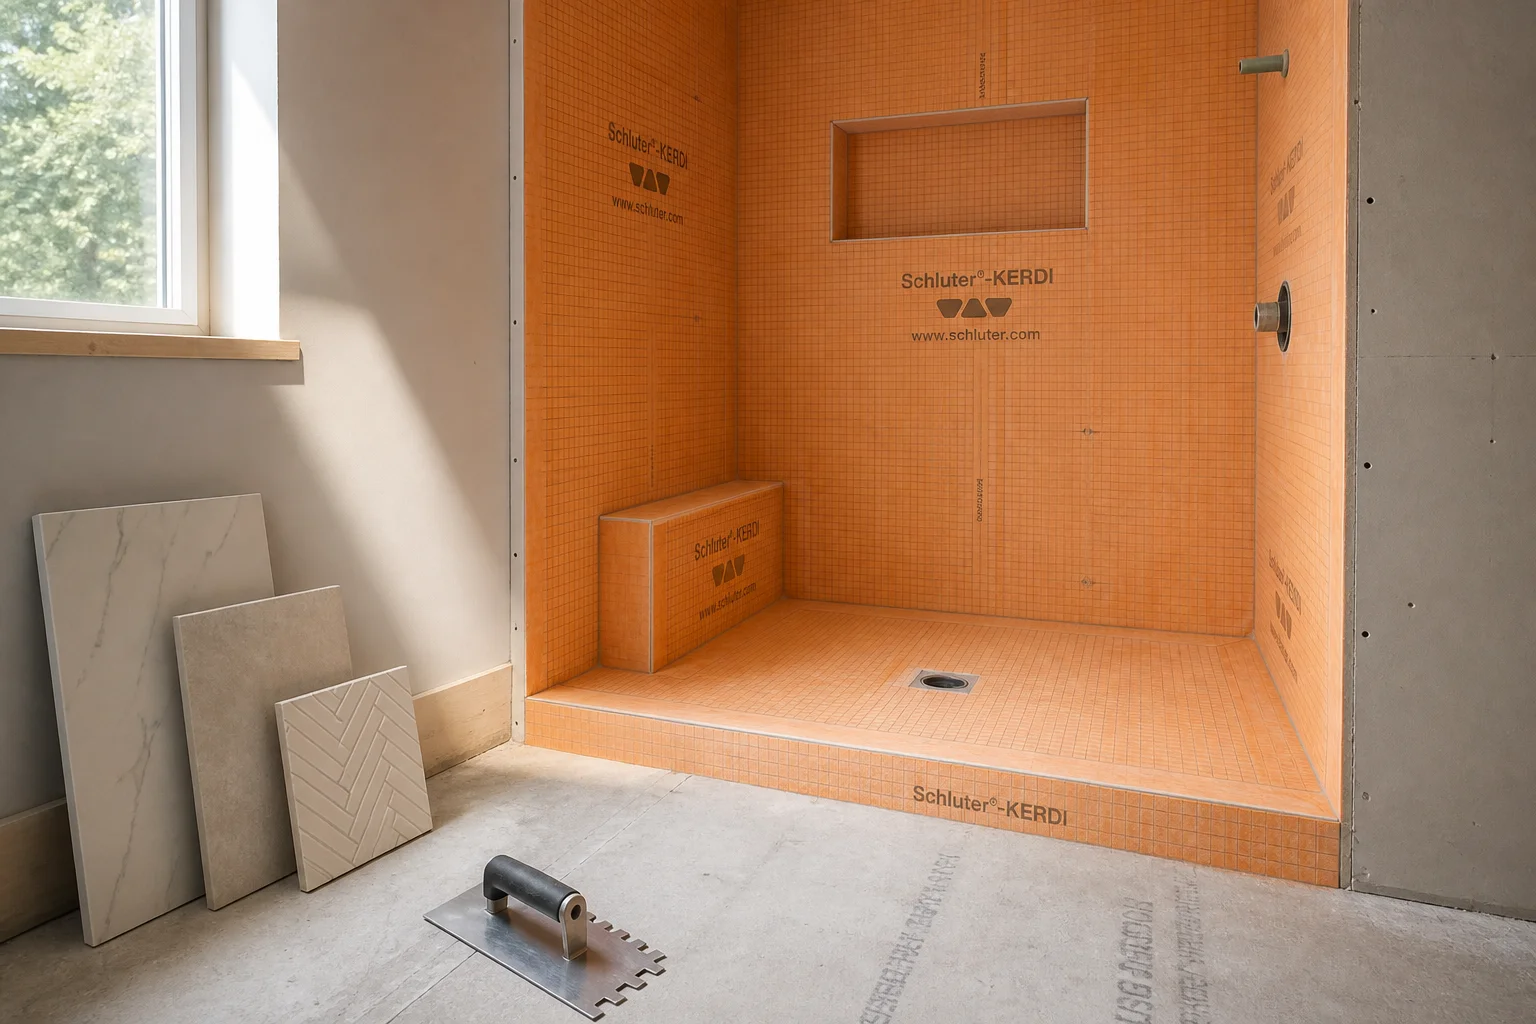
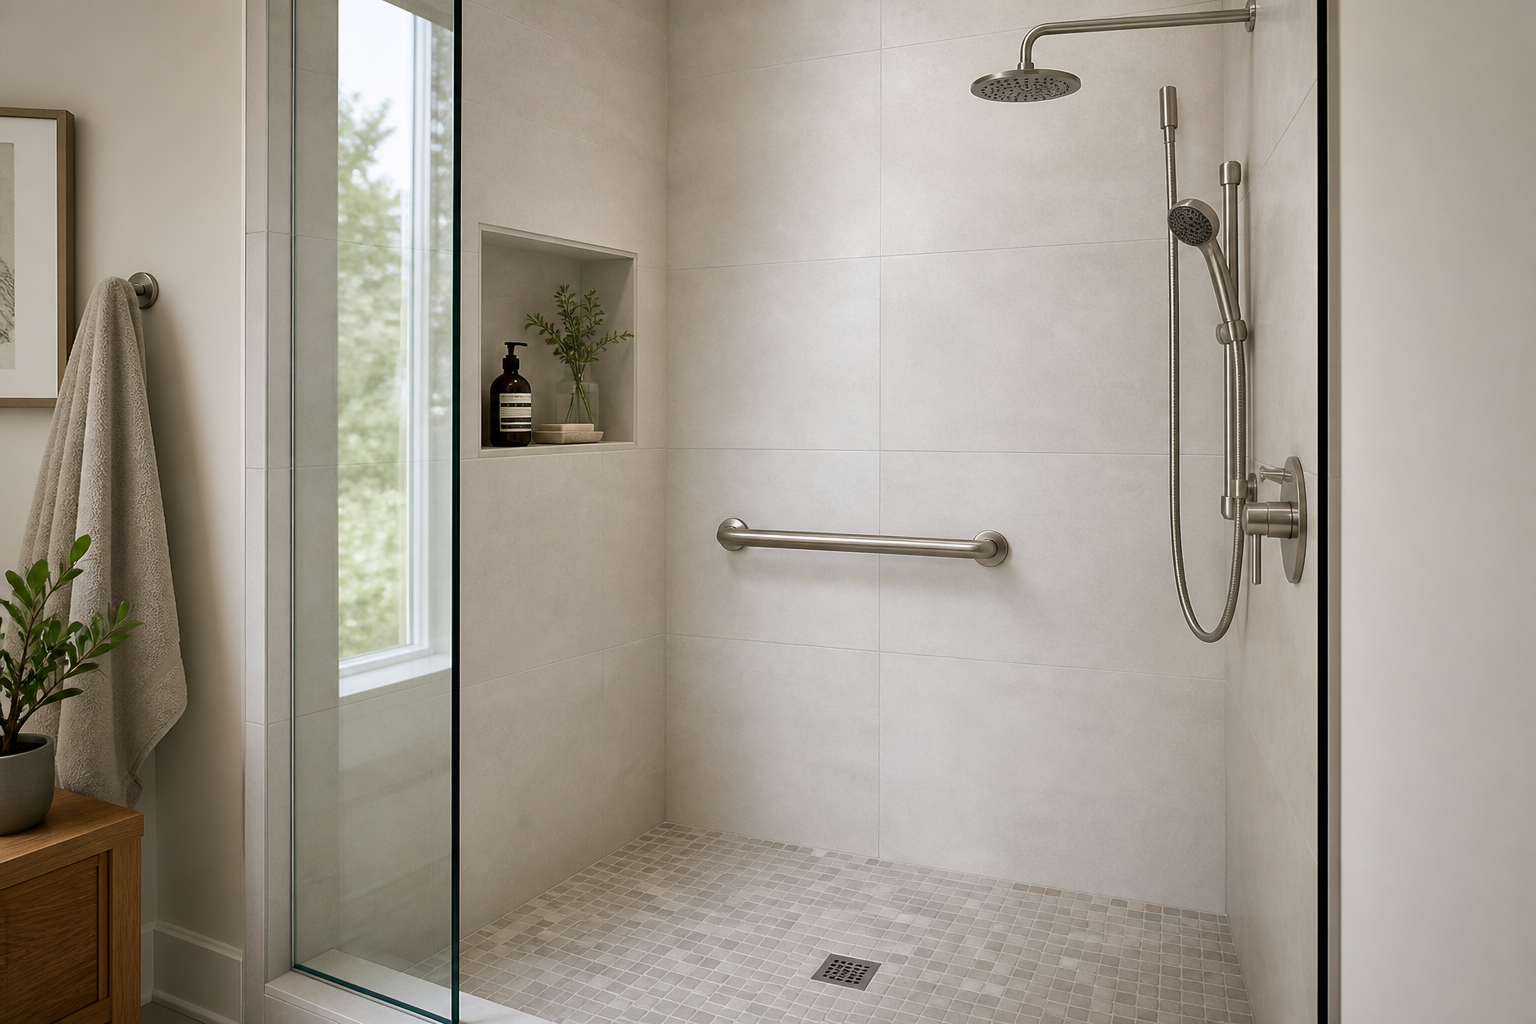
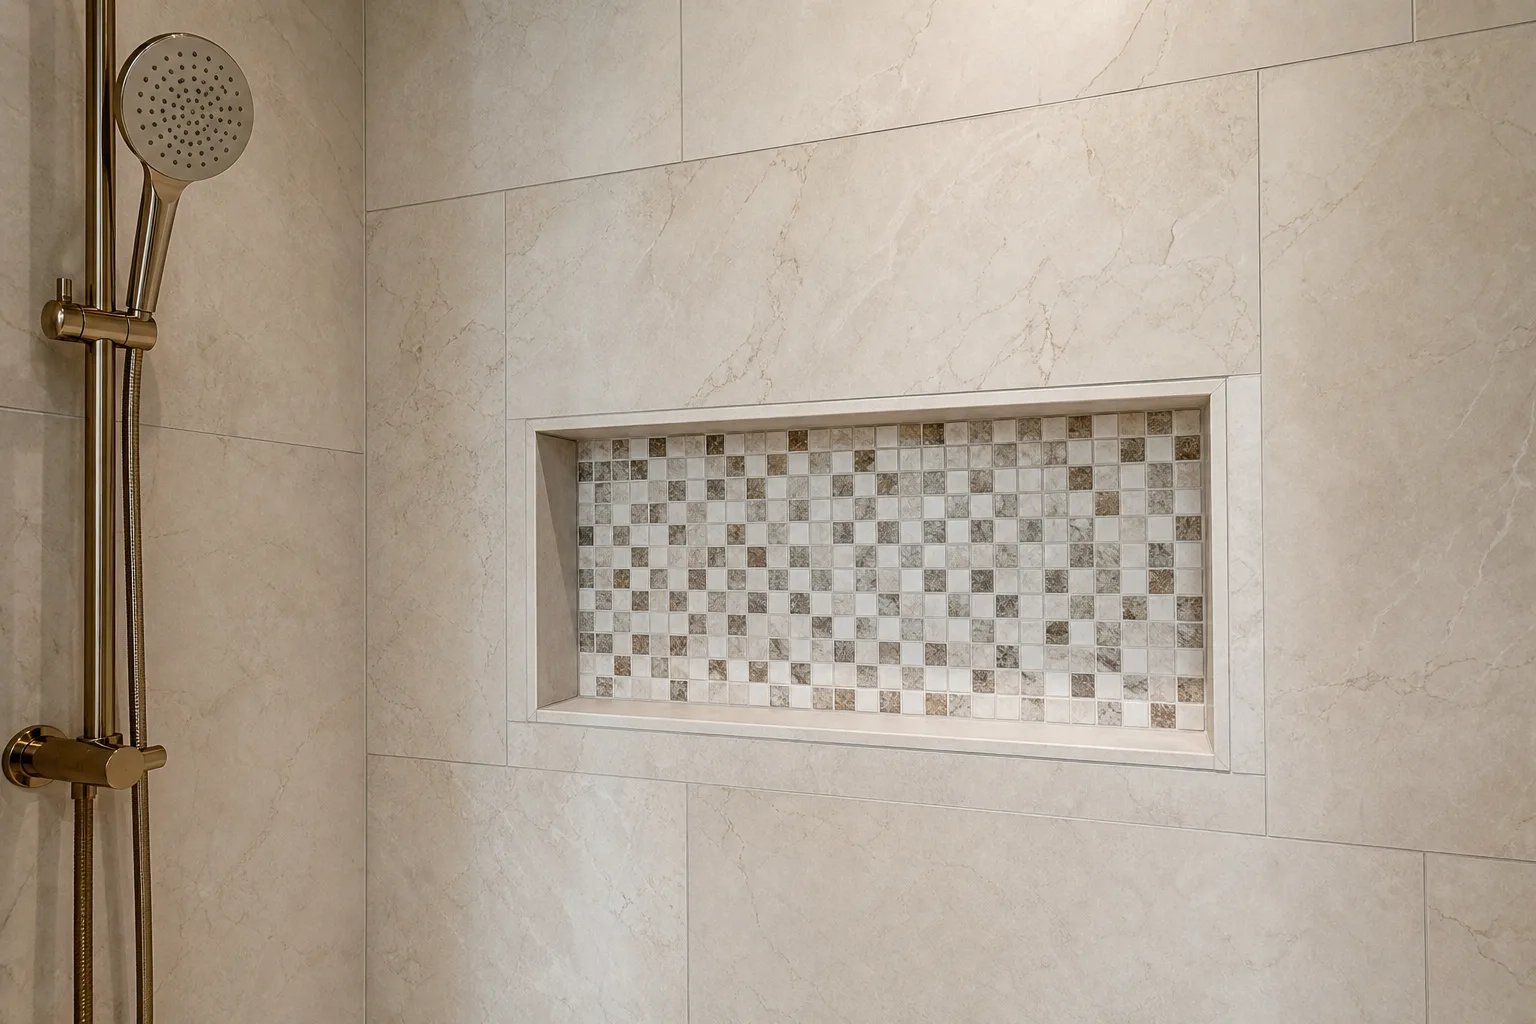
On the face of the substrate, in a correctly specified wet-area assembly, sits a bonded waterproof membrane certified to ANSI A118.10. This membrane is the designated barrier. It must be continuous across the field of the wall, lapped correctly at the floor transition, wrapped into the drain connection at the base, and reinforced at every inside corner and penetration. TCNA methods such as B415 and B421C document these assemblies with cement board backing, bonded membrane, mortar bed floors with quarter-inch per foot slope, and two-stage drains with weep protection.
Above the membrane, a bond coat of modified thin-set mortar adheres the tile. The tile and grout form the finish layer. They shed bulk water and provide the visible surface. They are not the waterproof layer. National Tile Authority installation guidance states this directly: the membrane constitutes the system's primary barrier, applied beneath the tile setting layer.
That is five layers before you account for optional vapor retarders, insulation in exterior walls, or fire blocking. Each layer is chosen before tile. Each layer affects every layer above it.
Substrate: The Decision Most People Never Know They Made
The substrate question sounds technical and therefore ignorable. It is not ignorable. It is the foundation every subsequent layer depends on.
Cement board became the default shower substrate because it replaced paper-faced drywall, which fails catastrophically when wet. Cement board solved the disintegration problem. It did not solve the waterproofing problem. Installers and homeowners conflated the two because both were improvements over what came before.
Drywall rated for limited wet-area exposure still appears in bathroom renovations, sometimes behind tile in areas that receive indirect moisture. ASTM C1396 gypsum boards are permitted by some codes in limited-exposure wall applications. They are not appropriate for direct water-contact zones such as shower walls. The distinction matters because a general contractor habituated to hanging green board everywhere may extend that habit into the shower enclosure where code and physics both say it does not belong.
Integrated substrate systems complicate the picture further. Pre-formed foam panels with polymer-cement coatings, such as those covered under TCNA method B422, function simultaneously as substrate and waterproof surface. Some carry ICC-ES evaluation reports documenting code compliance. These systems can perform well when installed per manufacturer instructions. They can also be oversold as eliminating the need for careful detailing at joints and penetrations, which no substrate eliminates.
The substrate decision affects weight, fastener pattern, joint treatment, and what waterproofing method applies on top. A wall specified as cement board with a sheet membrane follows a different detail path than a wall specified as an integrated foam panel system. Mixing components from incompatible systems at the substrate layer creates failure points that tile cannot bridge.
Waterproofing: Where the Wall Earns Its Lifespan
If the substrate is the skeleton, the waterproofing system is the skin that must never break.
Liquid-applied membranes cure to a seamless film when applied at manufacturer-specified wet-film thickness, typically thirty to forty mils, with fabric reinforcement at corners and changes of plane. Sheet membranes arrive at factory-controlled thickness, reducing the risk of insufficient coverage that trowel-applied products can hide. Peel-and-stick membranes bond directly to prepared substrate with pressure-sensitive adhesive. Each type can achieve A118.10 certification. Each type fails when corners are not reinforced, when the membrane stops short of the floor transition, or when fasteners penetrate the field without treatment.
The USG Durock shower system installation guide illustrates the detail density required at seemingly minor locations. Vertical inside corners receive membrane band treatment. Fastener penetrations get sealant struck flush with the surface. The membrane embeds in a bond coat applied with a notched trowel to eliminate air pockets. These are not finishing touches. They are the continuity that defines waterproof.
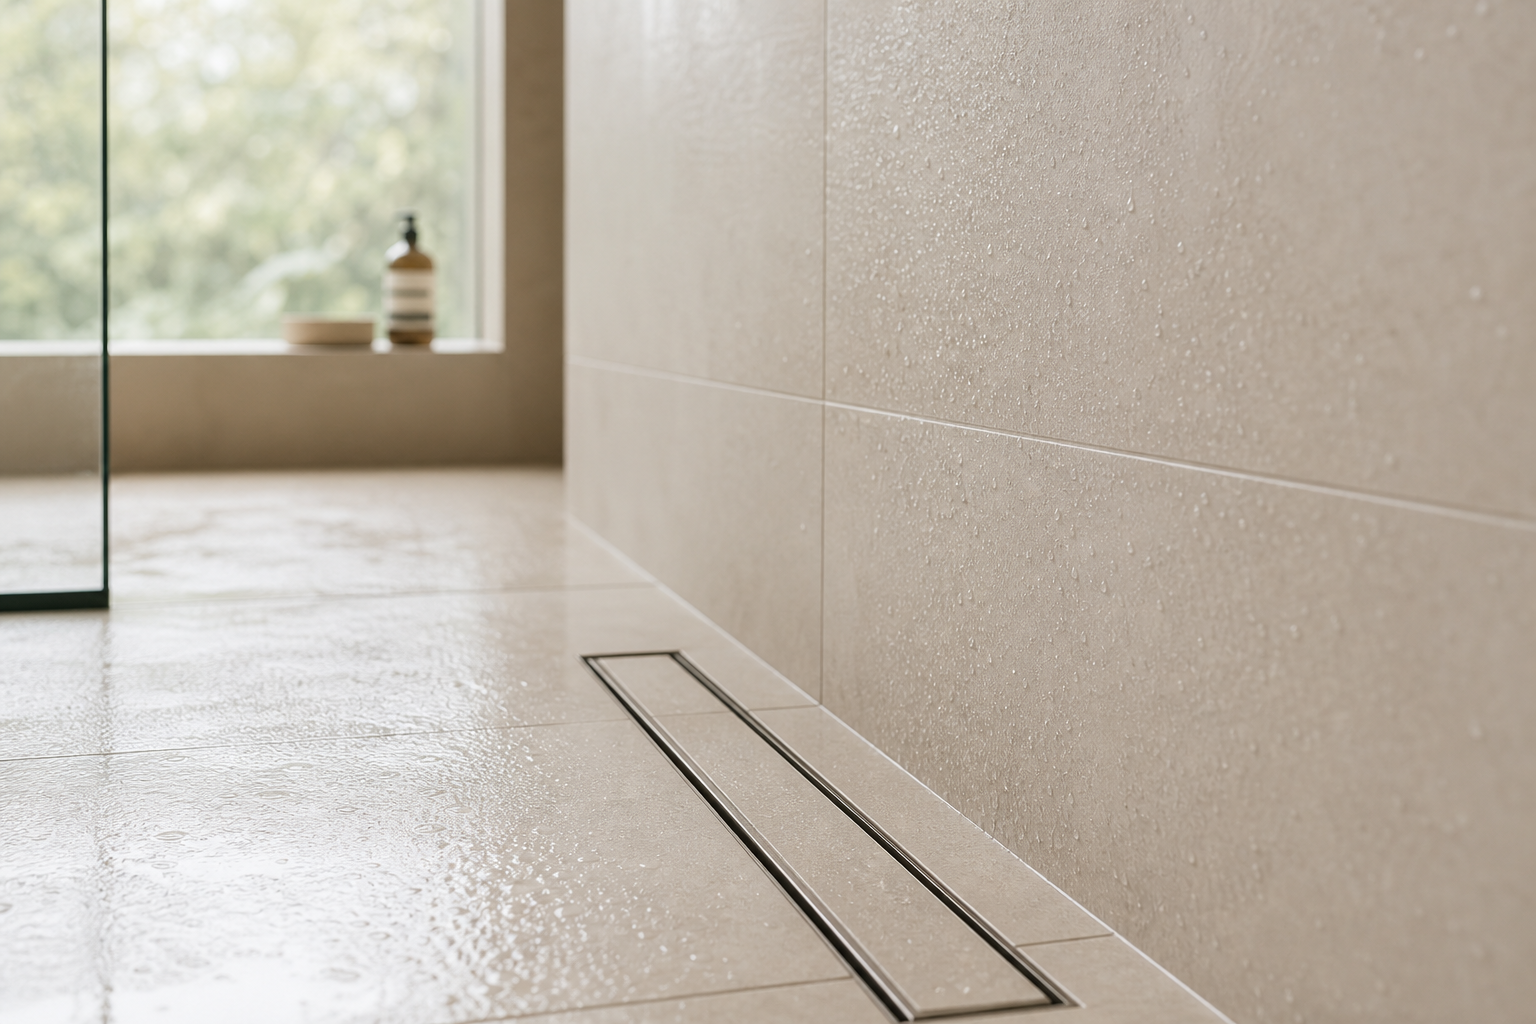
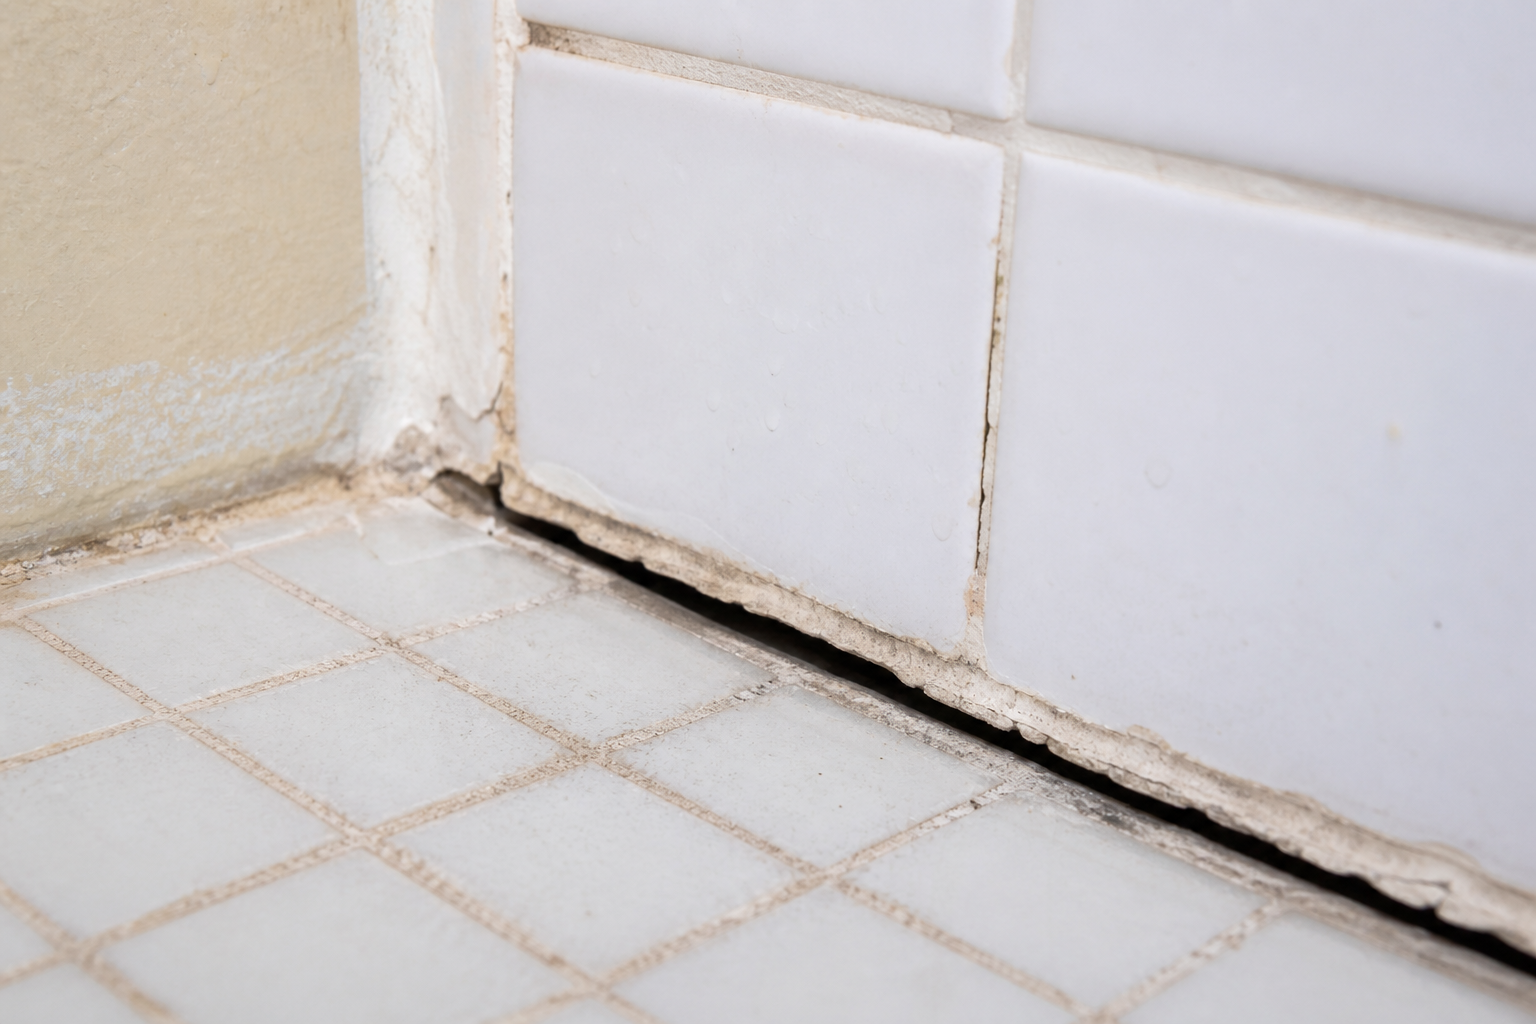
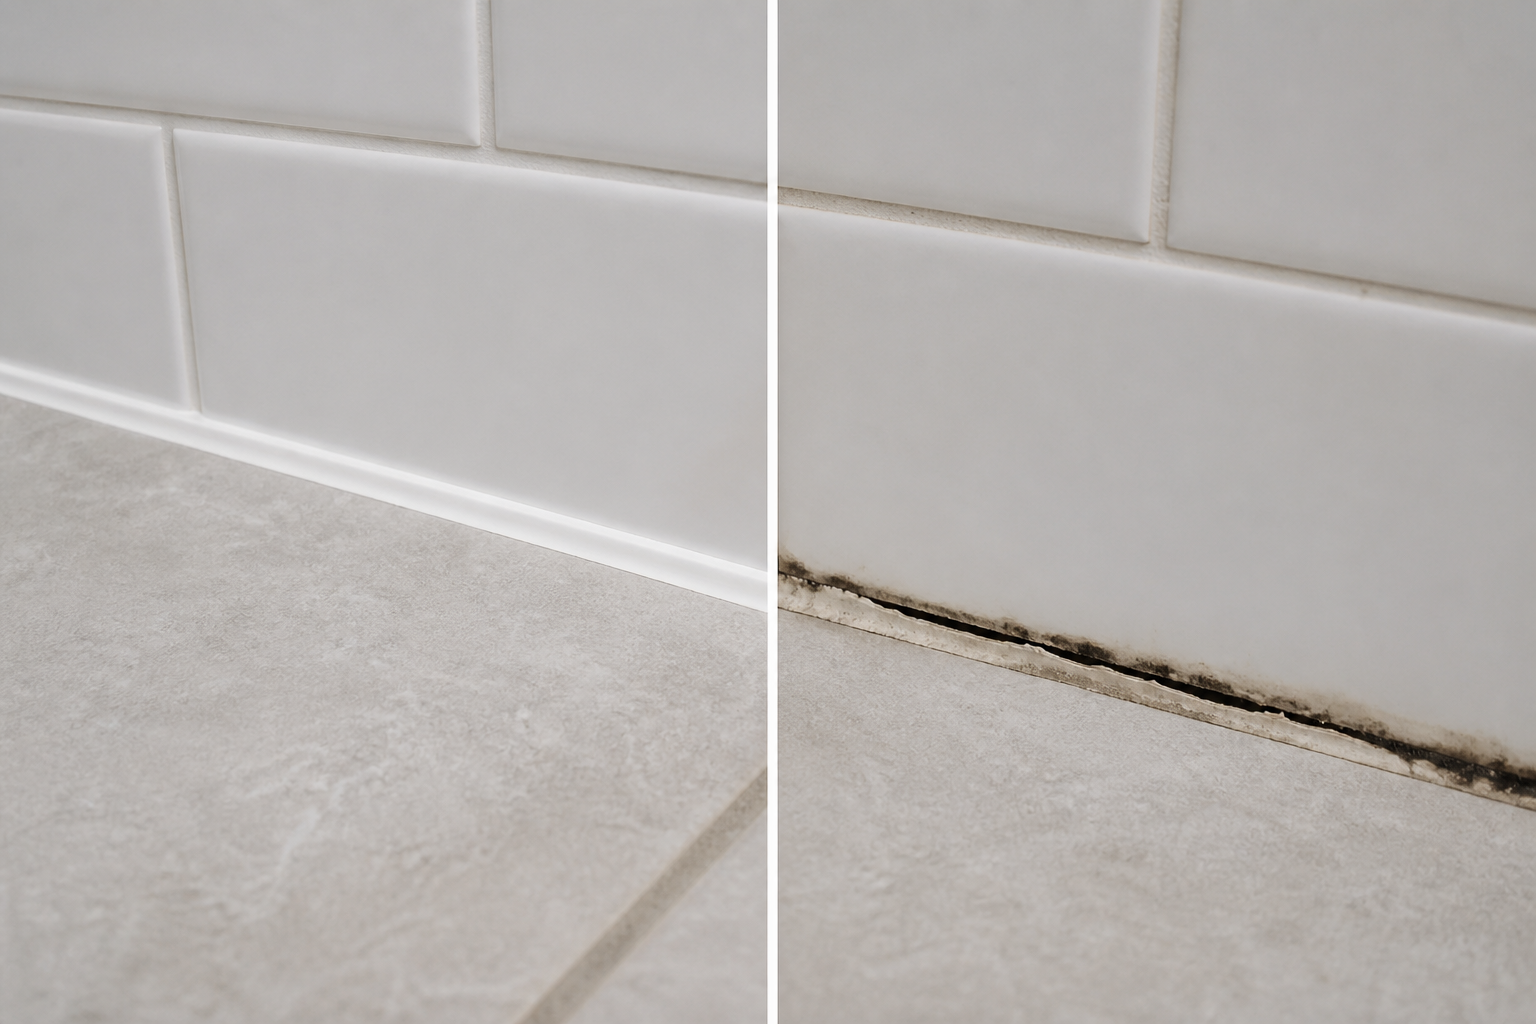
At the floor, the wall membrane must integrate with the shower receptor assembly. In a traditional mortar bed floor with a two-stage drain, the membrane laps over the clamping flange or bonds to a compatible drain body so water that enters the assembly above the membrane can weep into the drain below the tile layer. A wall membrane that stops at the top of the curb without lapping into the floor assembly creates a seam exactly where standing water accumulates during every shower.
The International Masonry Institute's TCNA B421C detail shows this integration explicitly: metal stud backing, cement backer board, topical bonded waterproof membrane tied into a two-stage drain with weep protection, optional vapor retarder, and tile adhered with modified thin-set. The detail is not exotic. It is standard practice for a shower that is expected to last decades.
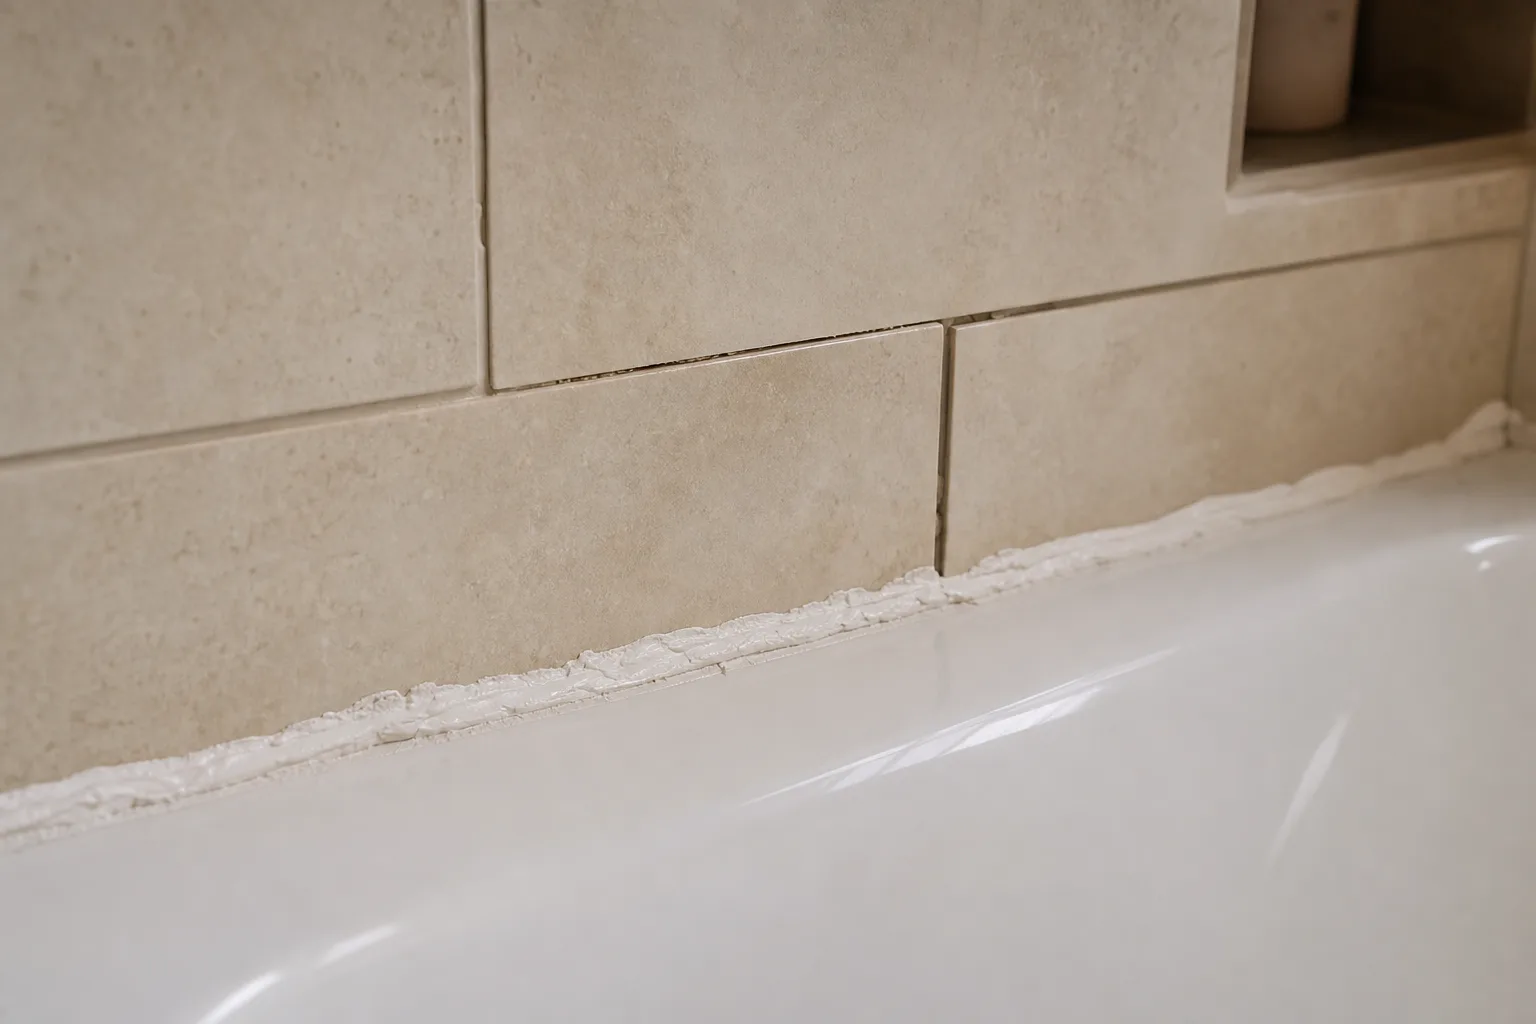
Movement Joints: The Layer Nobody Wants to Talk About
Tile is rigid. Buildings move. The conflict between those two facts is resolved at movement joints, not ignored.
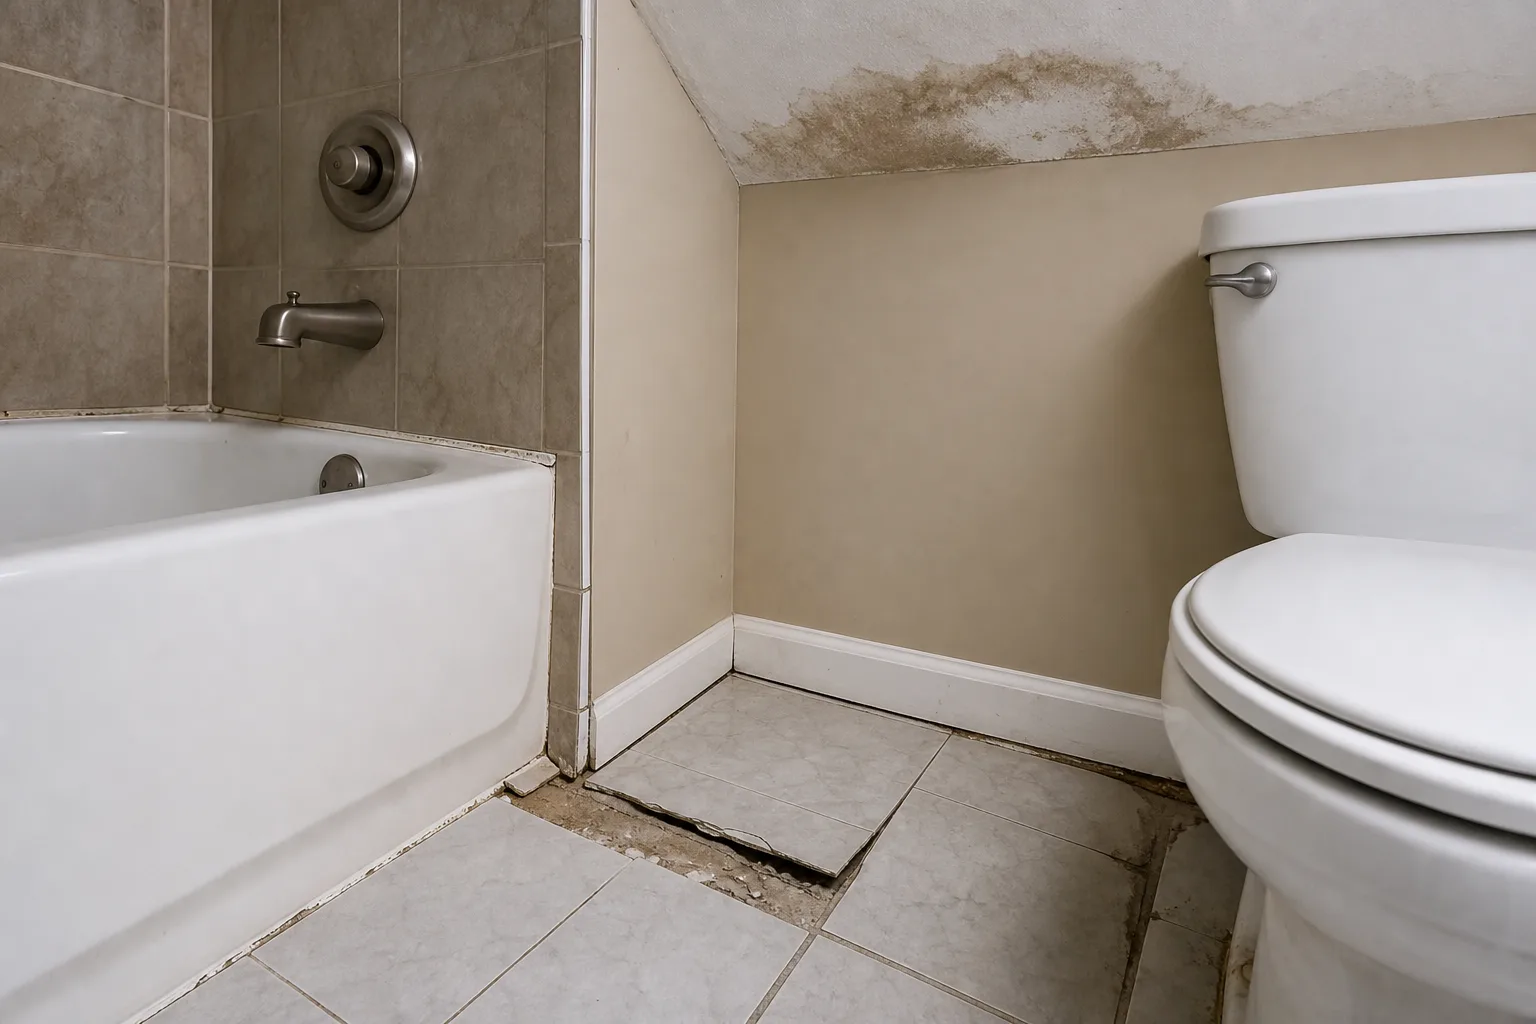
Every shower contains changes of plane where two tile surfaces meet at an angle. Floor to wall. Wall to niche. Bench to floor. Fixture flange to field tile. At these locations, differential movement concentrates stress. The floor assembly and wall assembly expand and contract at different rates. Framing lumber shrinks as it dries after construction. Grout, which is rigid, cannot absorb that movement indefinitely. It cracks.
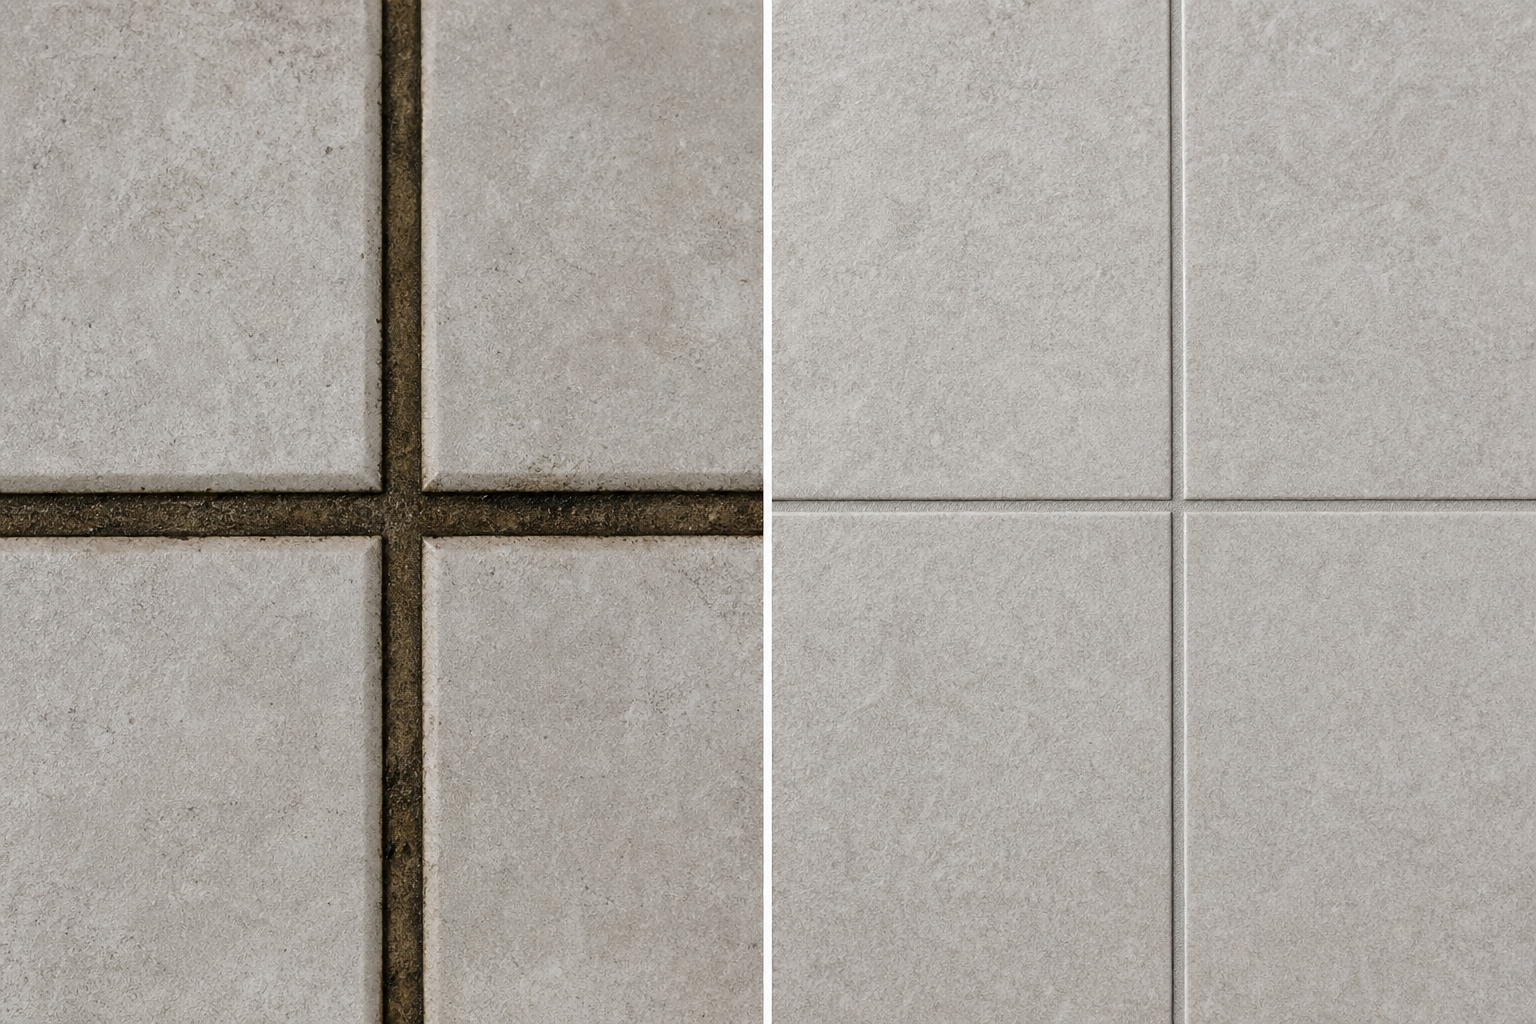
TCNA Detail EJ171 requires that inside corners, floor-to-wall transitions, and perimeter joints be filled with compressible elastomeric sealant rather than grout. The requirement is structural, not aesthetic. Grout at an inside corner will fail because the forces acting on it will exceed its tensile strength. The only variable is when.
A movement joint filled with sealant accommodates differential movement while the waterproof membrane beneath remains continuous. A movement joint filled with grout creates a crack that opens a direct path for bulk water entry at the most vulnerable elevation in the shower: the base of the wall where water pools.
This layer is decided during installation, not during tile selection. The tile setter must know which joints get sealant before the first tile is set. A homeowner who chose a beautiful large-format tile with minimal grout lines still needs sealant at every change of plane. The visual preference for fewer lines cannot override the mechanical requirement for movement relief.
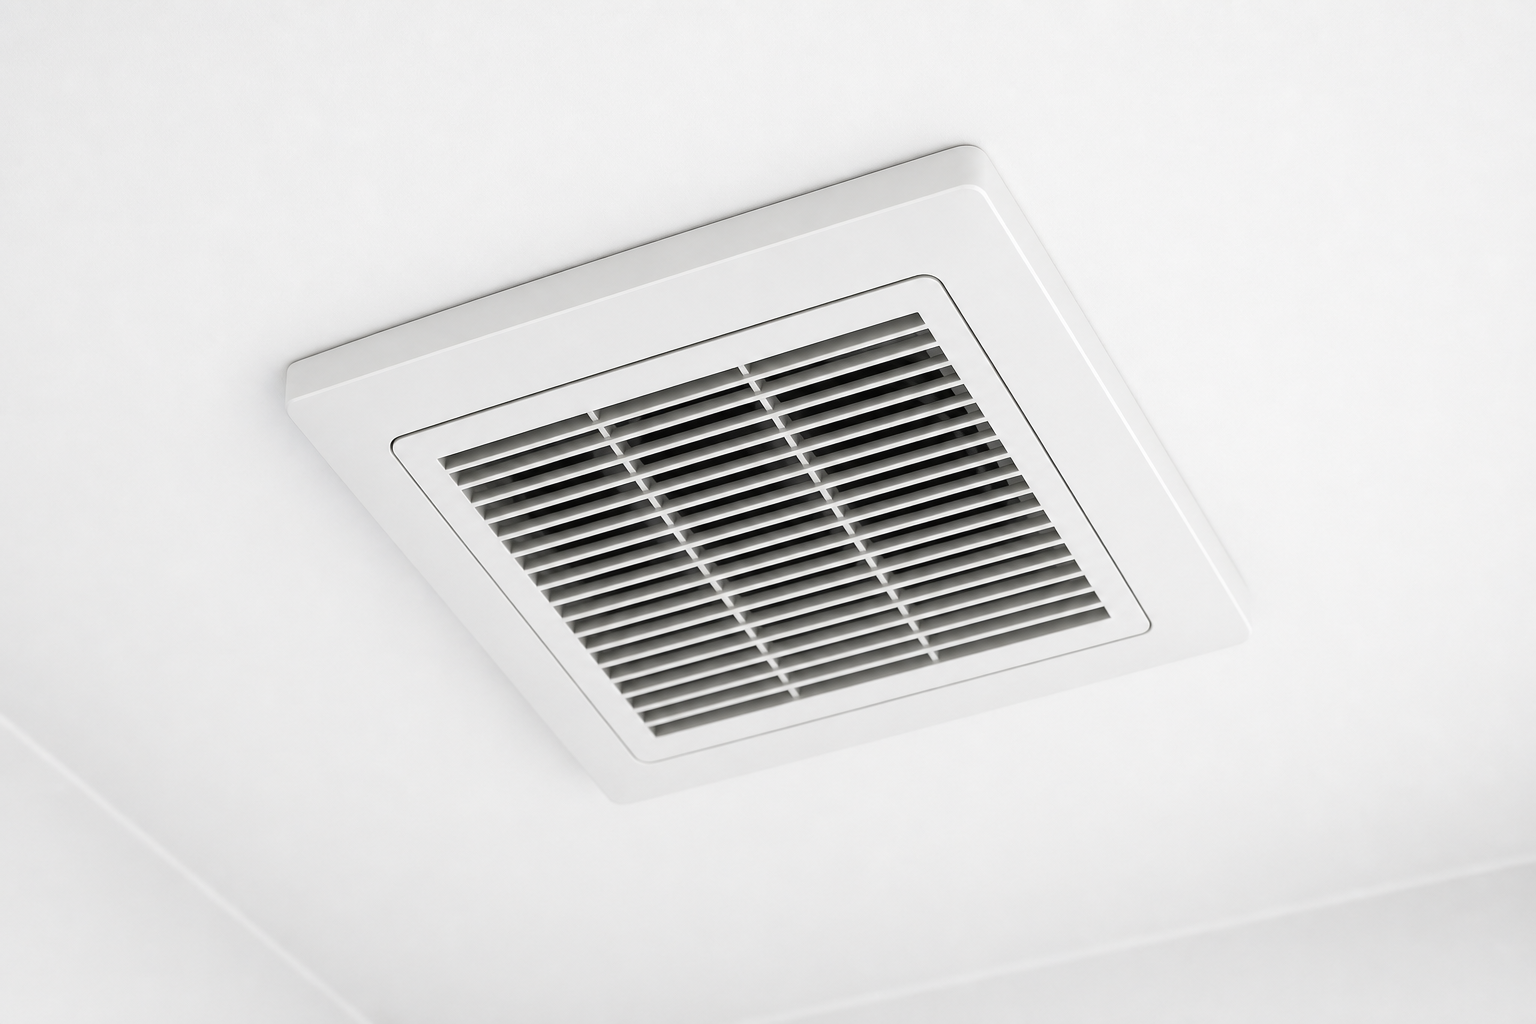
Ventilation: The Path Behind the Wall That Must Dry
Waterproofing stops liquid water from reaching the framing. It does not eliminate moisture in the room. Hot showers produce vapor. Vapor moves through materials in response to pressure differentials. An assembly that handles liquid water correctly can still accumulate moisture in the wall cavity if vapor transmission exceeds drying capacity and ventilation removes insufficient humidity from the room.
The Home Ventilating Institute recommends ducted bathroom exhaust fans sized to the room volume, with controls that keep ventilation running after bathroom use. A fan that is undersized, discharged into the attic rather than outdoors, or controlled by a switch that nobody uses after showering leaves humidity in the room that migrates into every porous surface.
Ventilation is not part of the tile assembly, but it is part of the wall's long-term performance. A perfectly waterproofed shower in a room with no effective exhaust will still produce condensation on mirrors, damp towels that never dry, and elevated humidity that stresses materials at every penetration. The wall assembly and the room environment work as a system.
Exterior walls add another variable. Insulation, vapor retarder placement, and the direction of vapor drive in cold climates affect whether the cavity behind the shower can dry toward the interior or exterior. A shower on an exterior wall in a heating climate requires more deliberate enclosure design than a shower on an interior partition. That design happens when the wall is open, not when the tile is on the sample board.
Why Tile Selection Comes Last in a Correct Sequence
The sequencing inversion is the most expensive habit in residential bathroom remodeling.
Showrooms are designed to sell surfaces. Homeowners are understandably excited about surfaces. Contractors who lead with tile selections accommodate that excitement because it moves the project forward and because finish selections are easier conversations than membrane specifications. The result is a room where the most visible decision was made first and the most consequential decisions were defaulted to whatever the installer usually does.
A correct sequence inverts that order. Structure and deflection are verified. Substrate type is specified. Waterproofing system and drain model are selected as a compatible pair. Movement joint locations are identified on the layout. Ventilation path is confirmed. Then tile format, weight, and adhesion requirements are chosen with full knowledge of what lies beneath them.
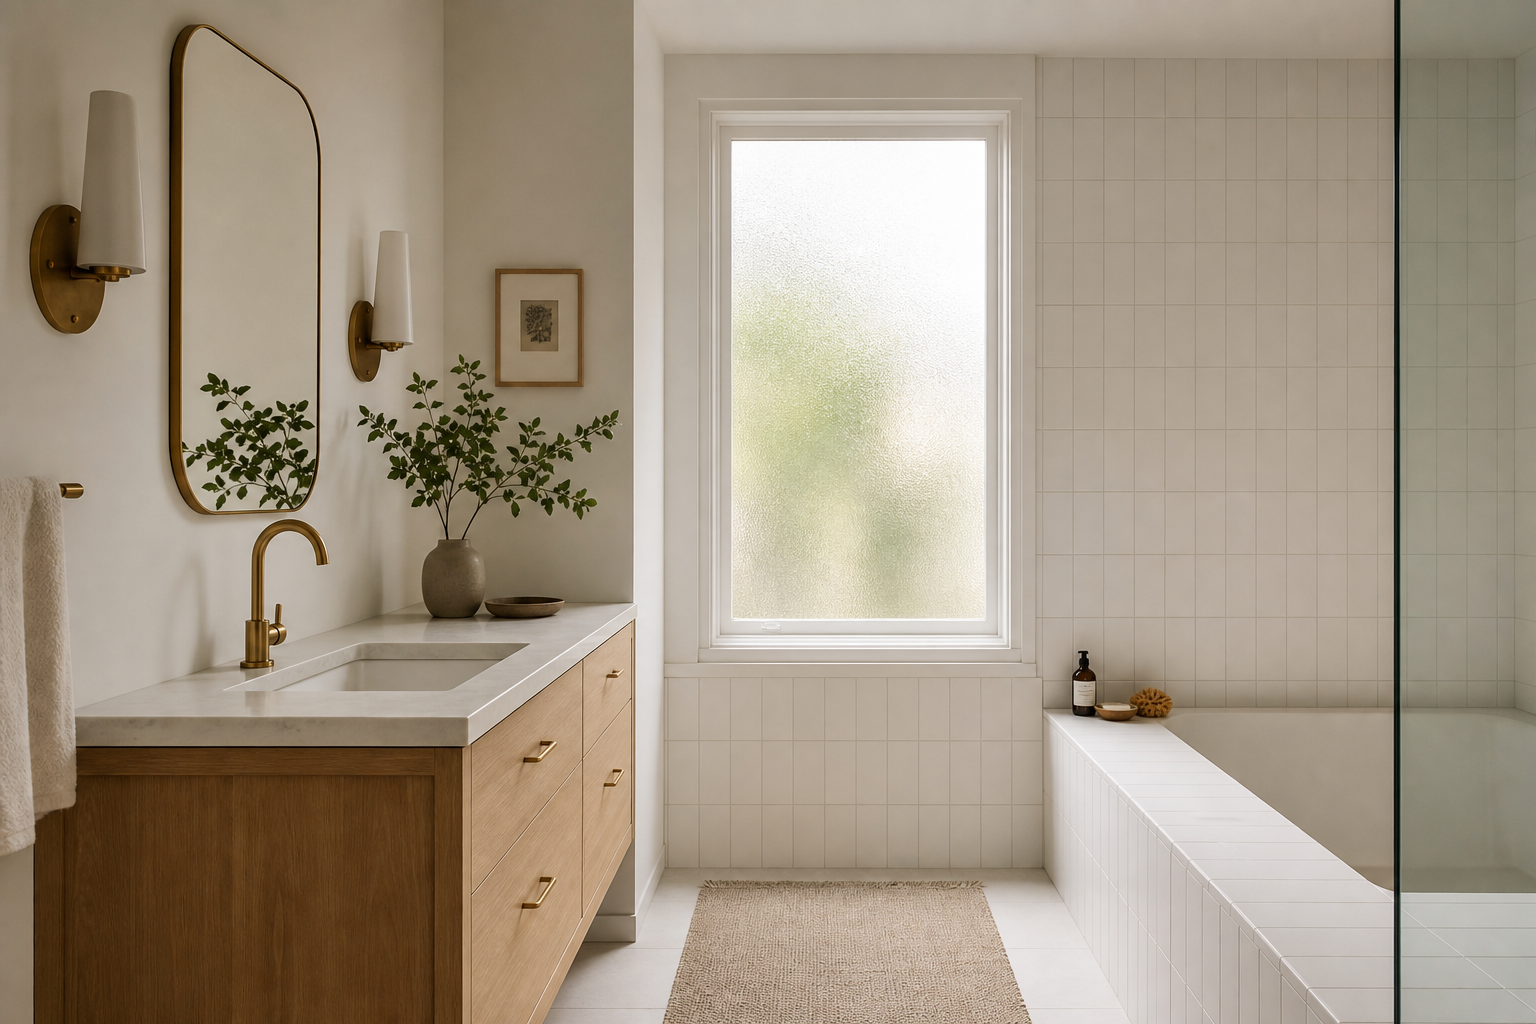
Large-format tile, for example, demands a flatter substrate than mosaic. A homeowner who selects twelve-by-twenty-four-inch porcelain before the substrate is prepared may discover that the wall needs skim coating or a different backer system to meet lippage tolerances. That discovery after waterproofing is installed is expensive. The same discovery before membrane application is a line item.
Epoxy grout reduces capillary water absorption at joints but does not eliminate the need for a membrane, movement joints, or proper drain integration. Natural stone may require a crack-isolation membrane with different performance characteristics than a shower waterproofing membrane. Each finish material imposes requirements on the assembly beneath it. Those requirements are knowable before the finish is chosen.
We draw the wall assembly section before the tile selection begins. The substrate, membrane, and drain connection are specified in writing before any sample boards arrive.